Below is a video detailing my scanning and printing process for the series, migrant narratives. Within the video I detail my research into scanning large format negs, and my process along with outputting them to an inkjet and a latex printer.
Scanning: MA Major Study Research
Initial Calculations
While using film within your photographic practice you inevitably get to the question, what do I do with the film once it is processed? The two options I contemplated were printing them in a darkroom using a traditional gelatin silver based process or scan the film and print digitally. I decided on the latter option, digital printing, as the cost to setting up a darkroom is expensive and there are no longer any darkroom rental facilities available in my area. Also having taught both print and digital printing I appreciate the advantages of the digital editing process. Scanning on the other hand is something I have done very infrequently and have never given much thought too. As such this was an area of the process that I wanted to explore as I have never been completely satisfied with the result I have obtained previously.
There are many ways to scan or digitize film, you can scan it using an assortment of different devices or photograph the film with a digital camera. The two methods of digitizing my negatives I have been exploring are scanning the negatives with an Epson V750 flatbed scanner and photographing them with a Canon 5D Mark III digital camera. The reason I decided on these two processes was they are commonly used, from a monetary perspective they are not expensive, and they are purported to give excellent results. This write up will look at my calculations for scanning on the Epson V750 flatbed scanner.
PRINT SIZE
Before I began digitizing the negatives I decided on a print output size, the film I am scanning is 4x5 black and white negative film. There is an art to scanning but simple formulas can help you decide how much resolution you need for different types of images (Fraser, 2009). So I am going to use a number of different formulas below that I have used for years to figure out, viewing distance of the print, and resolution.
I am going to print on two different devices an Epson Pro 9900 printer which has a maximum width of 44 inches. The second is the HP Latex 110 printer that has a maximum width of 54 inches, but the RIP software will allow me to tile and print the images on multiple vinyl wall wraps. So for the Epson I am going to print images 44x54 inches wide and on the HP I plan to double the size of the image and print on two vinyl panels, 88x108 inches wide. I want to make sure that the dimensions of the potential gallery space will allow for such a large print (See Print Viewing Distance below).
_____________________________________
PRINT VIEWING DISTANCE
There is two different sizes that I would like to print 44"x54" and 88"x108" prints.
88"x108" prints have an optimal viewing distance of 17.41' feet
44"x54" prints have an optimal viewing distance of 8.7' feet
The formula below is my calculations to determine the optimal viewing distance for the prints. The formula calculates the diagonal length of the print, then the diagonal length allows me to calculate the optimal viewing distance.
44"x54" Print
44 squared is 1936 x 54 squared is 2916
(1936 + 2916) = 4852
Square root of 4852 = 69.66" which is the diagonal length of the print.
Formula For Optimal Viewing Distance Of Print
69.66" x 1.5 = 104.5" or 8.7 feet
88"x108" Print
88 squared is 7744 x 108 squared is 11664
(7744 + 11664) = 19408
Square root of 19408 = 139.31" which is the diagonal length of the print.
Formula For Optimal Viewing Distance Of Print
139.31" x 1.5 = 208.97" or 17.41 feet
The gallery space, Studio Sixty Six, will only support two image at 88"x108" inches as there is only two spaces with that viewing distance depth. The space will also allow for proper viewing of the 44”x54” prints. My other concern is the resolution needed to scan the image. I know that at 24" inches the minimum print resolution needed is 143 dpi to provide the illusion of continuous tone to an observer with 20/20 vision (Fraser Image Sharpening). This is a base level of dots per inch needed but I would like the image to be appear to be a continuous tone at a closer range (see Image Resolution and Resolution For Scanning below for the calculations).
_____________________________________
IMAGE RESOLUTION
The Epson printers maximum dpi (dots per inch) is 1440 (Epson, 2019) and the HP is 1200 (HP, 2019). The ppi (pixels per inch) resolution of images printer print at can be no better than half the specified dpi of the printer (Clarkvision, 2013). This translates into a maximum ppi of 720 and 600 respectively for each printer. From years of testing I know I can print all my images at half of that so I use 360 ppi half of Epson's pixels per inch.
_____________________________________
RESOLUTION FOR SCANNING
Knowing that I plan to print at 360 ppi and output at 88x108 inches, I use this formula to figure out my scanning resolution.
88"x108" Print
(88x360) = 31680
(108x360) = 38880
Using the longest dimension of the negative to determine the scanning resolution:
38880/5 = 7776 dpi
44"x54" Print
(44x360) = 15840
(54x360) = 19440
Using the longest dimension of the negative to determine the scanning resolution:
38880/5 = 3888 dpi
_____________________________________
The Epson V750 Flatbed Scanner has a maximum resolution of 4800 dpi (Epson Scan, 2019) it will not scan at 7776 dpi for the 88"x108" prints. So I will have to interpolate the image, which will add information that does not exsist in the orignial image (Fraser, 2003) or decrease the resolution of the image to get a print of that size. This I will have to test and see if it will work or I can scan for the 44"x54" print size.
Citations
Burke, A. (2017) Drum vs Flatbed Scanner - Side by Side Comparison. Available at: https://www.alexburkephoto.com/blog/2017/12/15/drum-vs-flatbed-scanner-side-by-side-comparison [Accessed 04 August 2019]
Clark Vision. (2013) ppi of Printer . Available at: https://clarkvision.com/articles/printer-ppi/ [Accessed 04 August 2019]
Kennedy, S. (2018) Epson V750 for 4×5 or Drumscan?. Available at: http://www.simonkennedy.net/blog/architectural-photography-2/4x5-flatbed-vs-drum-scan/ [Accessed 04 August 2019]
Epson (2019) Epson 9900 Printer Specs. Available at: https://files.support.epson.com/pdf/pro79_/pro79_ug.pdf [Accessed 01 August 2019]
Epson Scan (2019) Epson V750 Specs. Available at: https://www.filmscanner.info/en/EpsonPerfectionV750Pro.html [Accessed 03 August 2019]
HP (2019) HP 110 Latex Printer Specs. Available at: http://h10032.www1.hp.com/ctg/Manual/c04721790 [Accessed 01 August 2019]
Fraser, B. (2009) Real World Image Sharpening with Adobe Photoshop, Camera Raw, and Lightroom [Online] Available at: https://bookshelf.vitalsource.com/#/books/9780321679369/cfi/6/8!/4/704/2@0:0 [Accessed 01 August 2019]
Watson, K. W., (2019) All About Scanning Photos. Available at: http://www.rideau-info.com/photos/scanning.html [Accessed 03 August 2019]
Photographing Negs: MA Major Study Research
Another way of digitizing your film is using a digital camera, this technique I discovered while taking an online class Douglas Kirkland on Photography: Shooting with an 8x10 Camera. Kirkland explains his process, he uses a copy board stand to mount the DSLR camera pointing down, the negative is laying on a daylight corrected lightbox, and he uses a 50mm macro lens.
Douglas Kirkland on Photography: Shooting with an 8x10 Camera (Source: LinkedIn Learning, 2019)
My initial calculation is that printing at 1440 dpi (Epson Manual), the resolution of the Epson 9900, my maximum print size would be 4"x2.6". The formula for this calculation is:
22.3 effective megapixels 5760x3840 of Canon 5D MK III Sensor (Canon, 2019), divided by maximum resolution of Epson 9900 printer 1440.
5760 / 1440 = 4
3840 / 1440 = 2.6
______________
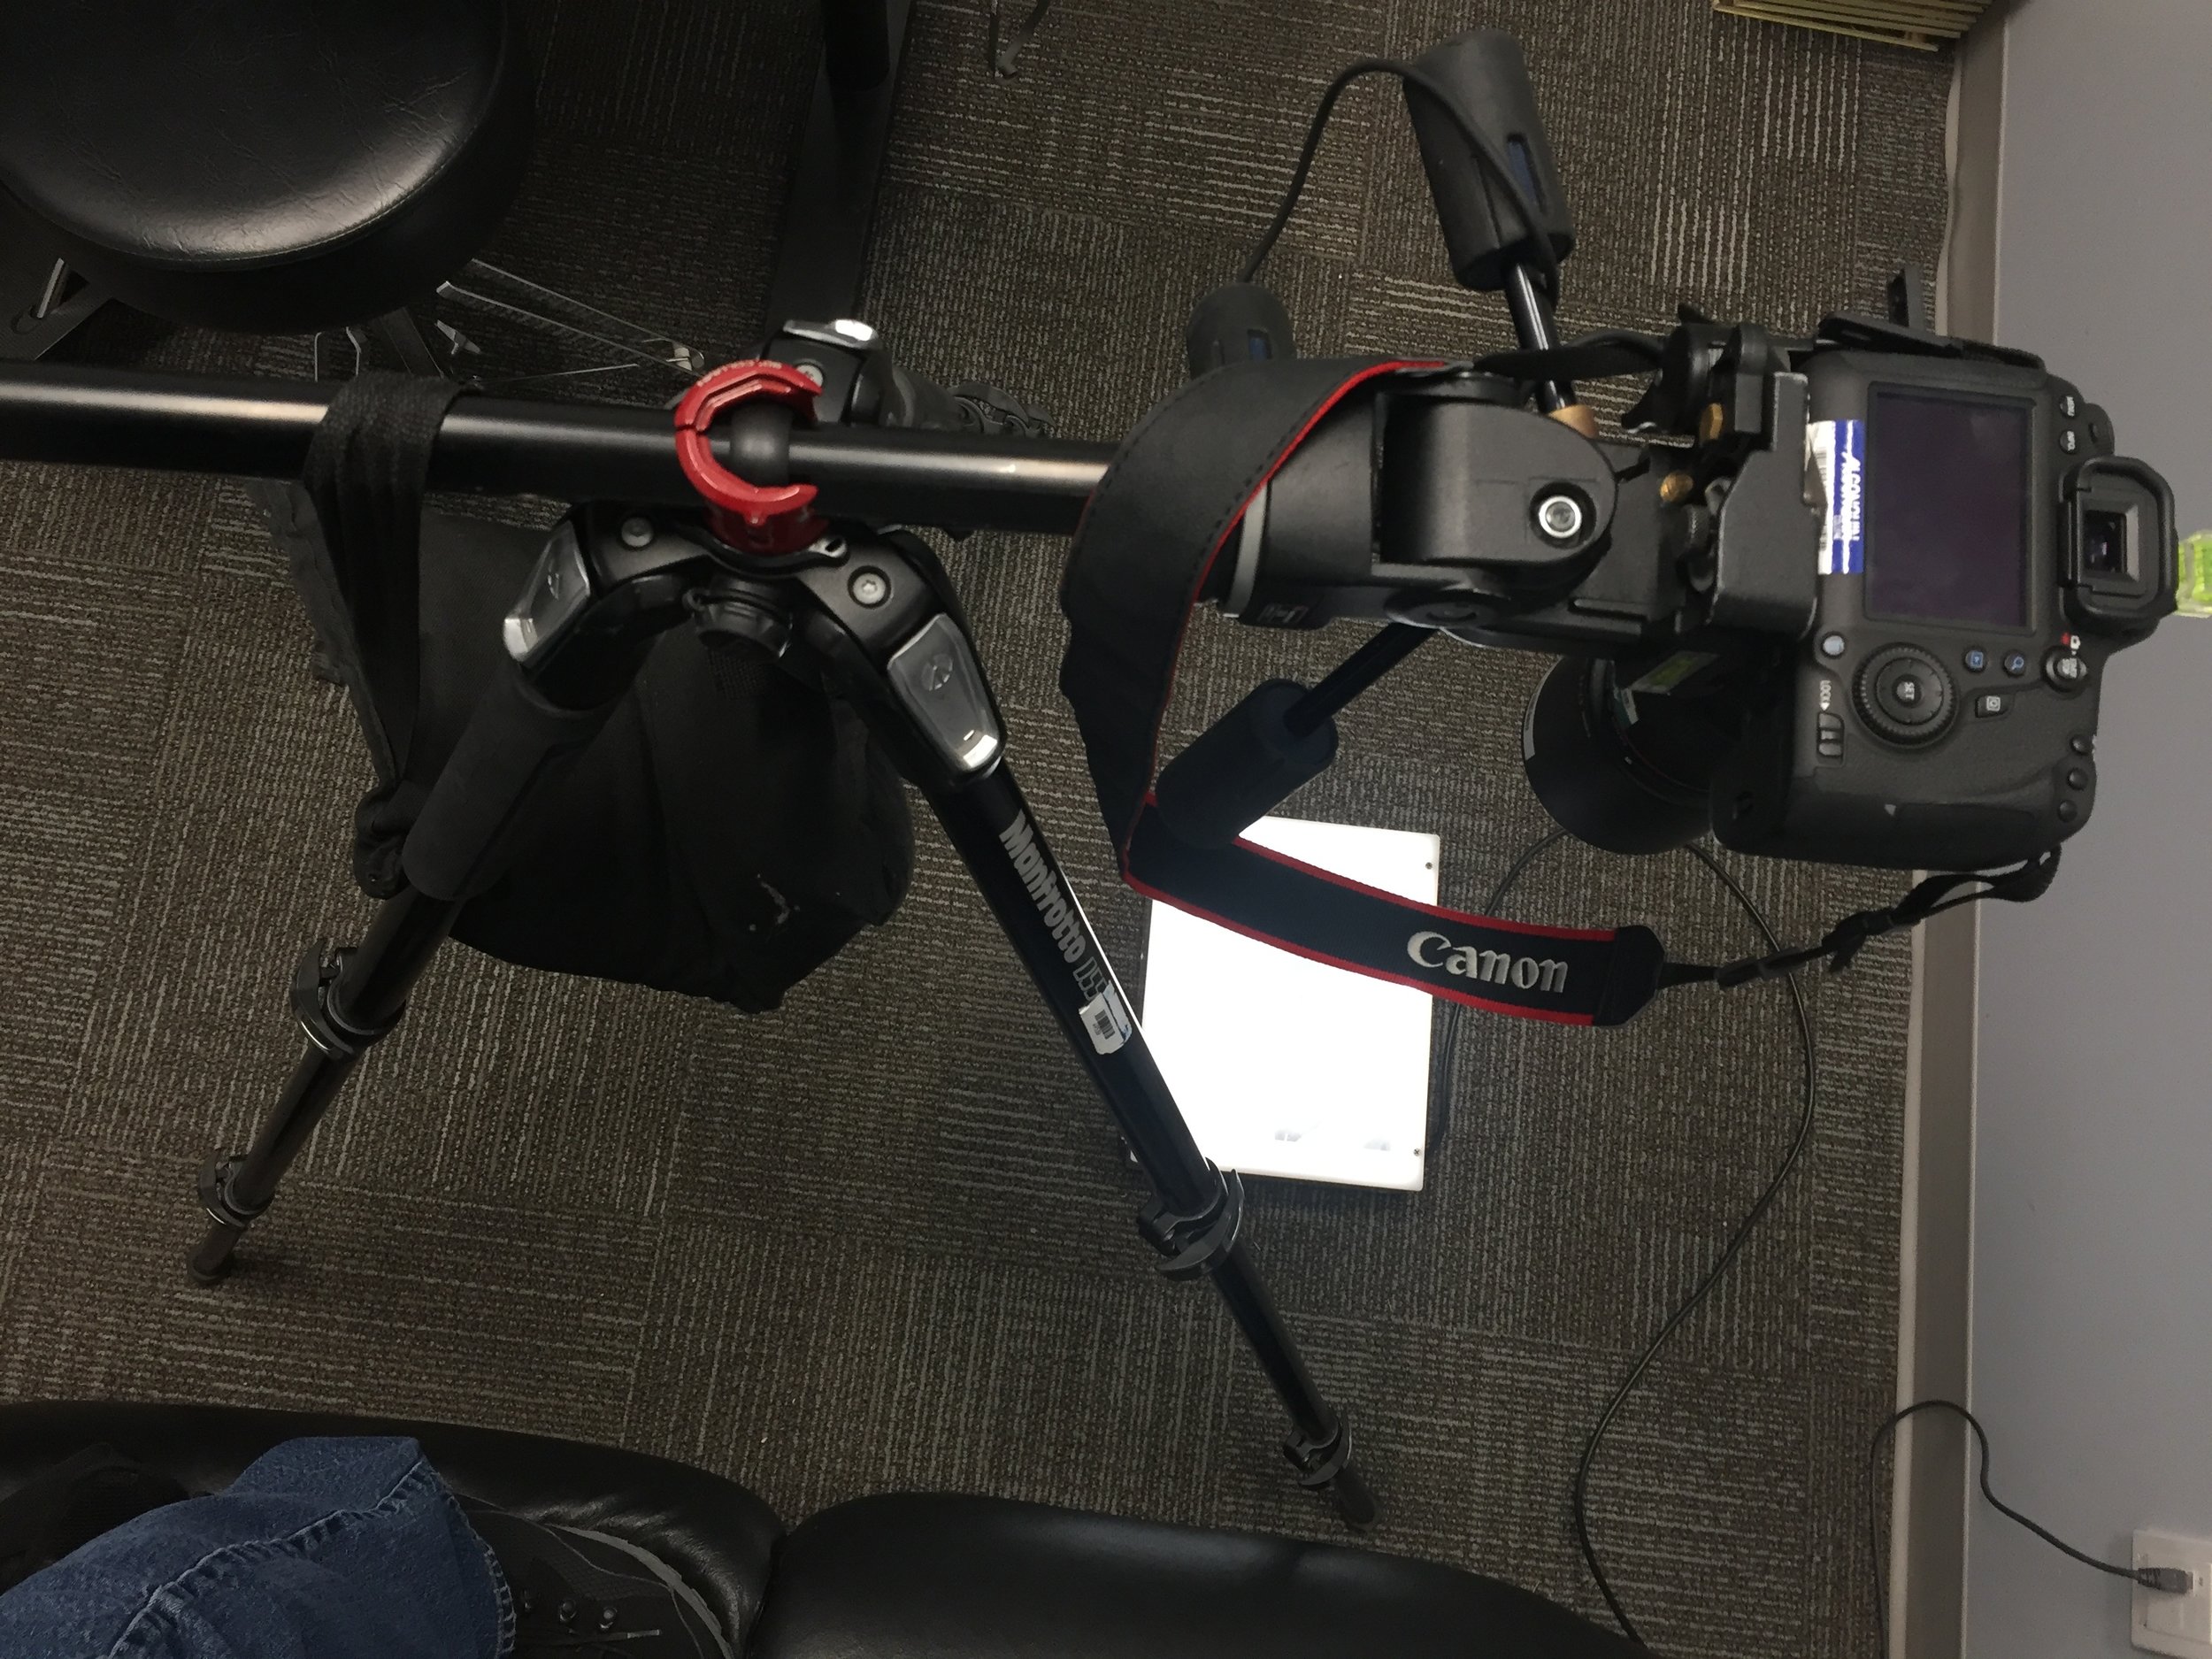
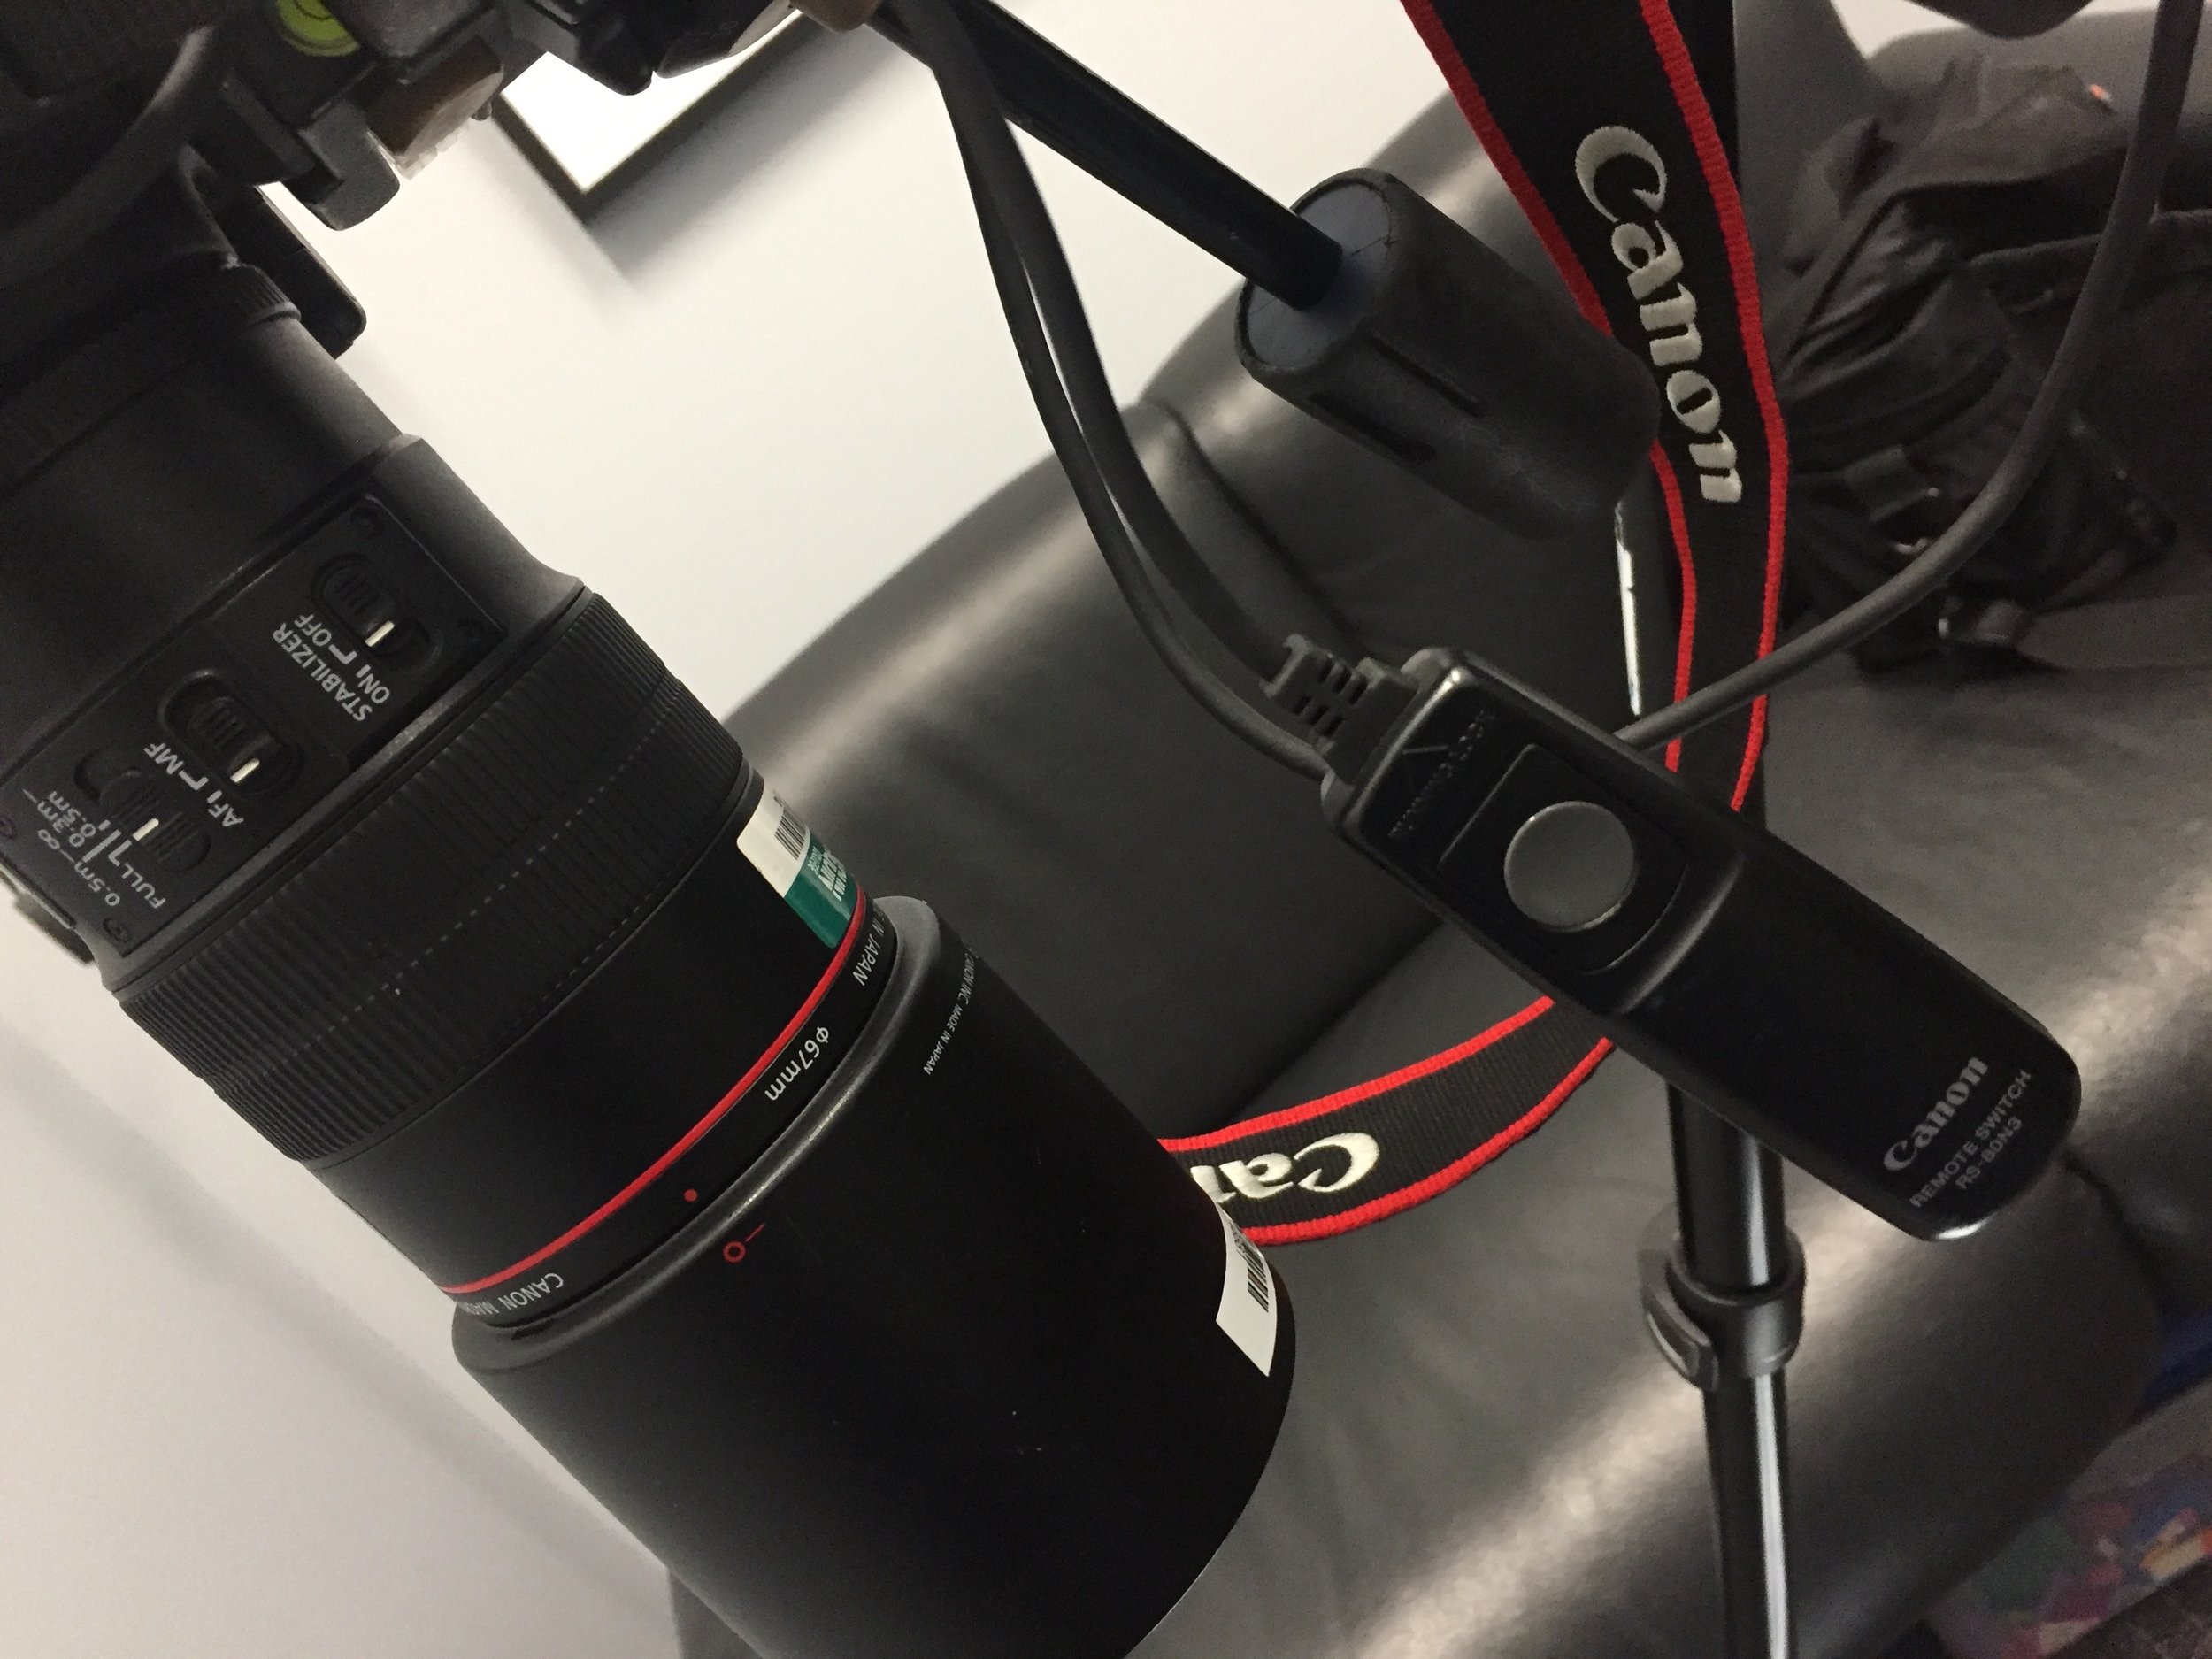
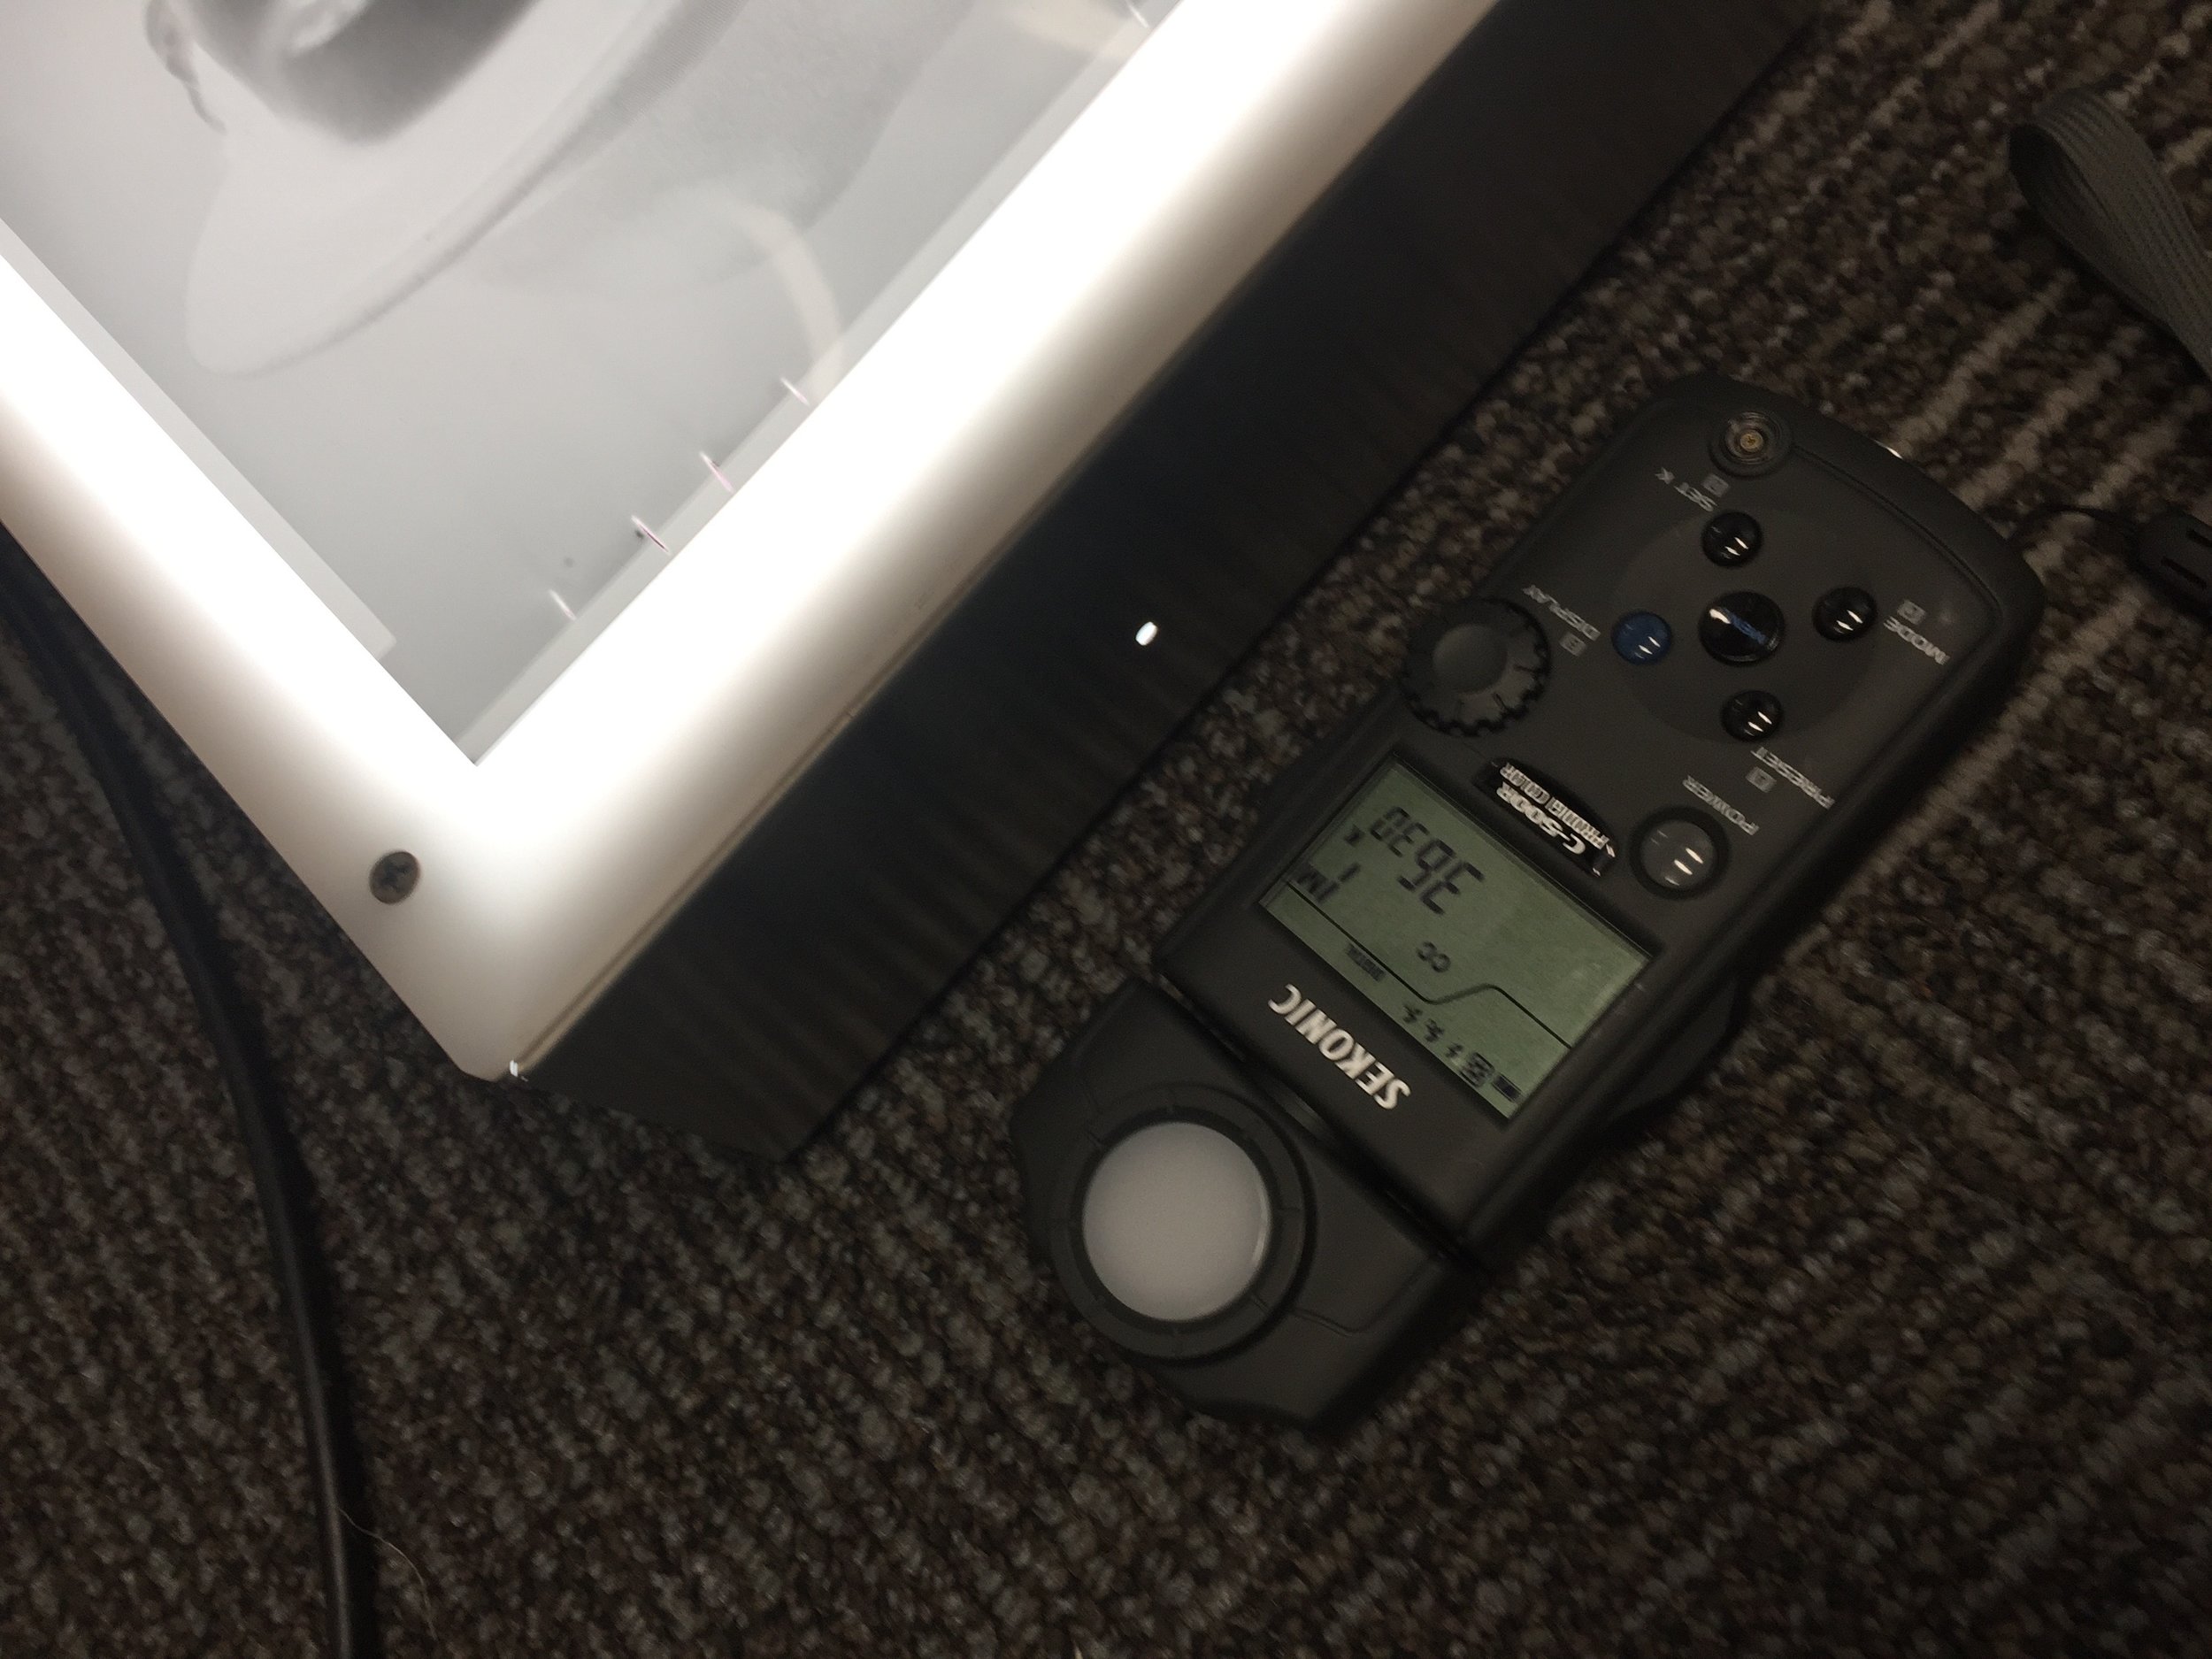
This is a concern bout I thought I would try and see for myself. At the time I was photographing 8x10 film. The equipment I used to photograph the film:
-Tripod with horizontal camera mount
Canon 100mm Micro Lens
Canon 5D MK III
Cable Release
Colour Meter
Daylight 5500 Colour Correct Lightbox
Sandbag
Bubble Level
I mounted the camera on the tripod pointing down, with the lightbox below and levelled the camera using the bubble level. I used a cable release so I would not be touching the camera, reducing camera shake. I taped the negative film down on the lightbox and focused the camera, I set my white balance to 5500, set the camera setting to RAW and neutral, and took a shot. The images were very blue green so I used a colour meter to measure the lightbox and got a reading of 3630 and shift of 1 magenta. I set the camera's white balance to these settings and compensated for the colour shift by adding the digital colour shift to the camera. Took a shot and the image colour turn out neutral. The reason I compensated for the colour was because it has been my Another way of digitizing your film is using a digital camera, this technique I discovered while taking an online class Douglas Kirkland on Photography: Shooting with an 8x10 Camera. Kirkland explains his process, he uses a copy board stand to mount the DSLR camera pointing down, the negative is laying on a daylight corrected lightbox, and he uses a 50mm macro lens.
Douglas Kirkland on Photography: Shooting with an 8x10 Camera (Source: LinkedIn Learning, 2019)
My initial calculation is that printing at 1440 dpi (Epson Manual), the resolution of the Epson 9900, my maximum print size would be 4"x2.6". The formula for this calculation is:
22.3 effective megapixels 5760x3840 of Canon 5D MK III Sensor (Canon, 2019), divided by maximum resolution of Epson 9900 printer 1440.
5760 / 1440 = 4
3840 / 1440 = 2.6
______________
This is a concern bout I thought I would try and see for myself. At the time I was photographing 8x10 film. The equipment I used to photograph the film:
-Tripod with horizontal camera mount
Canon 100mm Micro Lens
Canon 5D MK III
Cable Release
Colour Meter
Daylight 5500 Colour Correct Lightbox
Sandbag
Bubble Level
I mounted the camera on the tripod pointing down, with the lightbox below and levelled the camera using the bubble level. I used a cable release so I would not be touching the camera, reducing camera shake. I taped the negative film down on the lightbox and focused the camera, I set my white balance to 5500, set the camera setting to RAW and neutral, and took a shot. The images were very blue green so I used a colour meter to measure the lightbox and got a reading of 3630 and shift of 1 magenta. I set the camera's white balance to these settings and compensated for the colour shift by adding the digital colour shift to the camera. Took a shot and the image colour turn out neutral. The reason I compensated for the colour was because it has been my expereince that colour shifts, especially blue cyan, can add density to a image when converted to black and white.
Reviewing the images on my computer I found that they were soft and lacked the quality of the Epson V750 scans, which I also found to be soft. The Epson scans lacked contrast but the Canon captures were more contrasty and lacked detail in the shadows. The image sizes matched my calculations above, the images would be very low resolution going to print and would produce a very poor image at the size I needed.
This is a form of digitization that I would not use. The image quality was poorer than a flatbed scan, the contrast was too high and the setup was too much work for the results. I do not plan to print these files as I feel they would be a waste of time at any size.
Citations
LinkedIn Learning, (2019) Douglas Kirkland on Photography: Shooting with an 8x10 Camera. [Online Image]. Available at: https://www.linkedin.com/learning/douglas-kirkland-on-photography-shooting-with-an-8x10-camera/digitizing-negatives?u=2199673 [Accessed 04 August 2019]
DOF Calculator. (2019) Depth Of Field Calculator. [Online Image]. Available at: https://dofsimulator.net/en/ [Accessed 04 August 2019]
Machinski, J. (2019) Photographing Negatives, Unpublished.
Canon. (2019) Canon 5D MK III Manual. Available at: http://gdlp01.c-wss.com/gds/8/0300007348/06/eos5d-mk3-im8-en.pdf [Accessed 04 August 2019] that colour shifts, especially blue cyan, can add density to a image when converted to black and white.




Reviewing the images on my computer I found that they were soft and lacked the quality of the Epson V750 scans, which I also found to be soft. The Epson scans lacked contrast but the Canon captures were more contrasty and lacked detail in the shadows. The image sizes matched my calculations above, the images would be very low resolution going to print and would produce a very poor image at the size I needed.
This is a form of digitization that I would not use. The image quality was poorer than a flatbed scan, the contrast was too high and the setup was too much work for the results. I do not plan to print these files as I feel they would be a waste of time at any size.
______________
LinkedIn Learning, (2019) Douglas Kirkland on Photography: Shooting with an 8x10 Camera. [Online Image]. Available at: https://www.linkedin.com/learning/douglas-kirkland-on-photography-shooting-with-an-8x10-camera/digitizing-negatives?u=2199673 [Accessed 04 August 2019]
DOF Calculator. (2019) Depth Of Field Calculator. [Online Image]. Available at: https://dofsimulator.net/en/ [Accessed 04 August 2019]
Machinski, J. (2019) Photographing Negatives, Unpublished.
Canon. (2019) Canon 5D MK III Manual. Available at: http://gdlp01.c-wss.com/gds/8/0300007348/06/eos5d-mk3-im8-en.pdf [Accessed 04 August 2019]
Lens & Composition: MA Major Study Research
"The large ground-glass image is an entity in itself, a different experience from using the viewfinder. On the ground glass the image appears upside-down, and we must learn to view it in this position. We soon learn to "understand" the upside-down image, however, and it has a certain abstract quality that makes us more aware of its structure and its borders, as we are not dominated by the obvious dispositions of the subject. In effect the ground glass divorces us from the realistic appearances of the world. The ground-glass image thus exists as a thing in itself, specifically photographic and not merely a simulation of the "view" before the camera."
Adams, A.,& Baker H. R., (1981)
My process through-out my studies has focused only film and photographing with a view camera. Initially I wanted to capture the images digitally but a suggestion by my tutor to look at film and other camera formats lead me to the view camera. I am now fascinated by the process, underneath the black cloth and looking through the back of the camera really does divorce us from the realistic appearance of the world (Adams, Ansel The Negative). Judith Joy Ross said that it is so magnificently beautiful looking through a view camera, it is so mysterious (Judith Joy Ross) and she was right. Besides the amazing image quality there is a tremendous amount of control you have to manipulate the image with the camera movements.
Fig. 1: 360/620mm Technika Symmar Lens On The Right (Source: Machinski, 2019)
Lens
I am using an 8x10 Deardorff camera with a 360mm Technika Symmar lens, Figure 1., this lens is 360mm however it is a convertible lens meaning that by removing a lens element you can get a focal length of 620mm. The lens unconverted has an effective 35mm focal length of 52mm and converted 90mm. To figure out the conversion you multiple the focal length of your 8x10 lenses by .15 and for your 4x5 lenses by .30 (Tim Layton Fine Art). My concern is that the 360mm lens will be too wide, I want to compress the space behind the subject, and have a shallow depth of field.
Fig. 2: DOF Calculator Using 360mm Lens (Source: DOF Calculator, 2019)
depth of field calculator
Film is expensive so to give me a better understanding of what the final image might look like I began using an online Depth Of Field calculator, see Figure 1. The depth of field calculator allows you to set your aperture, subject distance, background, camera format, etc.. I use this tool to give me a rough estimate of framing and composition of the image and the depth of field. One of the features I like about a view camera is the shallow depth of field that can be achieved, however, it is difficult to focus too. It is my intention to photograph at the widest aperture possible to drop the background out of focus. The depth of field calculator using the 320mm lens was too wide, there was too much background included in the shot and the subject was too small. An option would be to move the subject forward but I know at 25 feet I can focus on my subject and not encounter any exposure compensation with the camera and lens combination I am using. If I did move closer I would need to apply the exposure compensation and I realize that this would affect my shutter speed which might already be very low. This is not an option and pushing my film to 800 ISO is not something I want to do either.
Using a 620mm lens in the calculator gave me the framing and composition that I was looking for, I do want to crop the bottom more so I will use the camera’s front rise to crop the subject below the knees.
Fig. 3: DOF Calculator Using 620mm Lens (Source: DOF Calculator, 2019)
technical concerns
There are two concerns that I have, one that the converted lens will not be as sharp. I can not find any documentation online to support this concern of mine but I can not imagine that removing the back lens element would allow it to maintain a sharp focus. Another concern is shooting wide open at F11, I will not be able to focus the camera precisely, I have about a foot of focus at that aperture. The Deardorff is an older wooden camera so the focus is not as precise as my 4x5 Sinar and the focusing ground glass is not as bright.
Fig. 4: Cropped For Final Composition (Source: DOF Calculator, 2019)
composition thoughts
One of the reasons I want to crop the subject above the knees is I do not want any foreground. The reason for this is I want this to be a metaphor for their journey up to this point, the path forward is unclear. I do want the subjects to appear to be in motion though I do not want them to appear to be statues. In Figure 4, I cropped the depth of field calculator image to compensate for the rise I want to apply. The large amount of space above I want to represent the sense of freedom the migrants feel being in their new country but I do not want the top to be open to the sky completely, not to airy and free. This is because I get a sense from the interviews of the migrants that they will never feel completely comfortable in their new country, their journey has changed them in a way made them more worldly and at the same time they realize their displacement in the world.
Citations
Adams, A., Baker H. R., 1981. The Negative. 12 th ed., Bulfinch Press.
DOF Calculator. (2019) Depth Of Field Calculator. Available at: https://dofsimulator.net/en/ [Accessed 04 August 2019].
Machinski, J. (2019) 360/620mm Technika Symmar Lens On The Right. August 2019. Unpublished.
Connections: MA Major Study Development
I have established connections with migration agencies and networks through previous modules. I have stayed connected with them through social media platforms, specifically LinkedIn and Twitter. These platforms seems to be more inline with their clientele and networks. I have formulated an email to each of the networks I am interested in working with:
Hello,
I am a local photographer and professor in the Photography Program at Algonquin College. Louisa Taylor recommended that I contact you regarding a project I am working on for my MA.
Currently, I am completing my MA in Visual Communication and working on a photo and interview series with migrants and refugees, and I am looking for subjects for my final series.
The focus of my work has always been to tell people’s stories. For this series, I am photographing portraits and recording audio interviews of migrants and refugees. The images are photographed using a large-format camera and will be printed in a large scale in order to confront the viewer, to have people stop and listen to their stories and hopefully realize our shared humanity.
The final work will be submitted in an ebook form for my final MA project and I hope to have a showing of the work in Ottawa. This is a self-funded not for profit venture to raise awareness and support. I am not asking for funding just introductions to people within your network that might want to share their migration story. I would be happy to provide your organization with the final project to use as you see fit.
Here are some of my recent projects:
Emerging From Darkness: vimeo.com/310195821
The Thread: vimeo.com/310192953
My other recent and ongoing projects are on my website: jasonmachinski.com
I have contacted, these migration networks and organizations:
Ottawa Community Immigrant Services Organization
Development and Peace Caritas Canada
World Skills Employment Centre
Ottawa Local Immigration Partnership
After making the initial connection I hope ask them to send out an email to their network if possible, the email is below:
Migration Narratives
Is a culminating project for my MA studies, its goal is to put a face and a voice to migration through photographic portraits, audio interviews, and research on the benefits of migration. I believe that listening to other’s stories, and sharing your own, can lead to mutual understanding, friendship, and peace.
This portrait series is photographed on film using an antique 8x10 view camera. Participants will be photographed and then a short audio interview will be conducted. The interview is about their migration story. Participants will be provided with prints and digital files. All images and audio will be published in an ebook, and a showing of the work will hopefully take place at a local gallery early next year.
email: talk@jasonmachinski.com
phone: 613-558-5789
web: jasonmachinski.com
The day after I sent the email I was contacted by the chair of Development and Peace and was put into contact with one of their volunteers who has a South Sudanese friend and activist who would like to share his story, his name is Deng. I was also contacted by the Ottawa Community Immigrant Services Organization and have a meeting setup with their Director for August 7.
I plan to do a follow up email, direct message, or call within a week if I do not get any response from the other organizations.
On Location: MA Major Study Development
These are two separate location setups the Test Shoot with Mark Baylin and the First Shoot with Deng. For each I was using the Deardorff 8x10 Field Camera and a portable battery pack system for lighting, an Elinchrom Ranger pack and a Profoto B1.
The battery pack lighting systems was used as the 8x10 generally needs a bit more light than digital capture and I was not sure if I needed to match the intensity for he sun or overpower it. These lights are quite powerful and they also allowed me to use a soft box to soften the light.
The second location with, the subject Deng, was the same location from the Gear & First Shoot: MA Major Study post. Like the location scout I photographed Deng in the early light, the light is softer and easily balanced with the flash’s power.
I use an ambient incident light meter, spot meter and flash meter to get initial readings. I meter with the spot meter for the areas that I would like darkest detail and put that in Zone III and gauge the rest of the exposure and flash power on that. I set the flash to one stop over the ambient exposure for the Deng shoot. However, I was using the aperture to try and darken or lighten the background something I should have used the shutter speed for. This is because the shutter controls the ambient exposure and the aperture controls the flash to a large degree.
Citations
Baylin, M. (2019) Mark Test Shoot and Deng First Shoot August 2019. Unpublished.
Gear & First Shoot: MA Major Study Development


Location Scout
Did a final location scout a week before the first shoot, on the same date and time. Initially I wanted to use an area familiar to the subject, but realized that I would have less control over the locations. I want locations with linear perspective, perhaps roads or paths to symbolize the journey the migrants are on. It was not until after I reviewed the location scout contact sheet that I realized how much I liked image 19, see Image Gallery Fig. 3. There are repeated bollards on the road and the trees frame the street in very nicely, creating a nice enclosed space along with a repeated pattern, which enhances the linear perspective. I planned to photograph Deng on the curb placing his head close to the vanish point.
First Shoot
The first subject for this series wa Deng from South Sudan, we met and I interviewed him a few days before, so the day of we could focus on capturing the photographs. I shot in the morning at 8AM ANNIE LEIBOVITZ QUOTE ON LIGHT IN THE MORNING. I was using flash on the subject, my intention was light the subject one stop over the ambient exposure (f8, 1/30). The camera was set to the flash exposure of f11, 1/30. What I failed to realize at the time was that by setting my background exposure is really controlled by the shutter when using flash. For future shoots I will try to remember that as I would like to bracket the background exposure to see what it would look like darker to lighter than the subject.
The images are soft photographing wide open is difficult to do with a Deardorff, as I had mentioned before, the ground glass is not as bright and the focus control is not that smooth.
.
Citations
Machinski, J. (2019) Contact Sheet. August 2109. Unpublished.
Machinski, J. (2019) Deng & Larry 01. August 2109. Unpublished.
Machinski, J. (2019) Deng & Larry 02. August 2109. Unpublished.
Machinski, J. (2019) Deng 01. August 2109. Unpublished.
Machinski, J. (2019) Deng 02. August 2109. Unpublished.
Machinski, J. (2019) Deng 03. August 2109. Unpublished.
Machinski, J. (2019) Deng 04. August 2109. Unpublished.
Test Shoot: MA Major Study Development
Before my test shoot I was able to get my hands on some expired Polaroid Type 55 film, this was great for allowing me to see the shot framed up and to judge my exposure. My initial concerns about the 8x10 Deardorff camera not focusing was heightened after looking at the polaroids during the shoot. The polaroids were overexposed making it hard to judge critical focus, I assumed that it was because the film was expired.
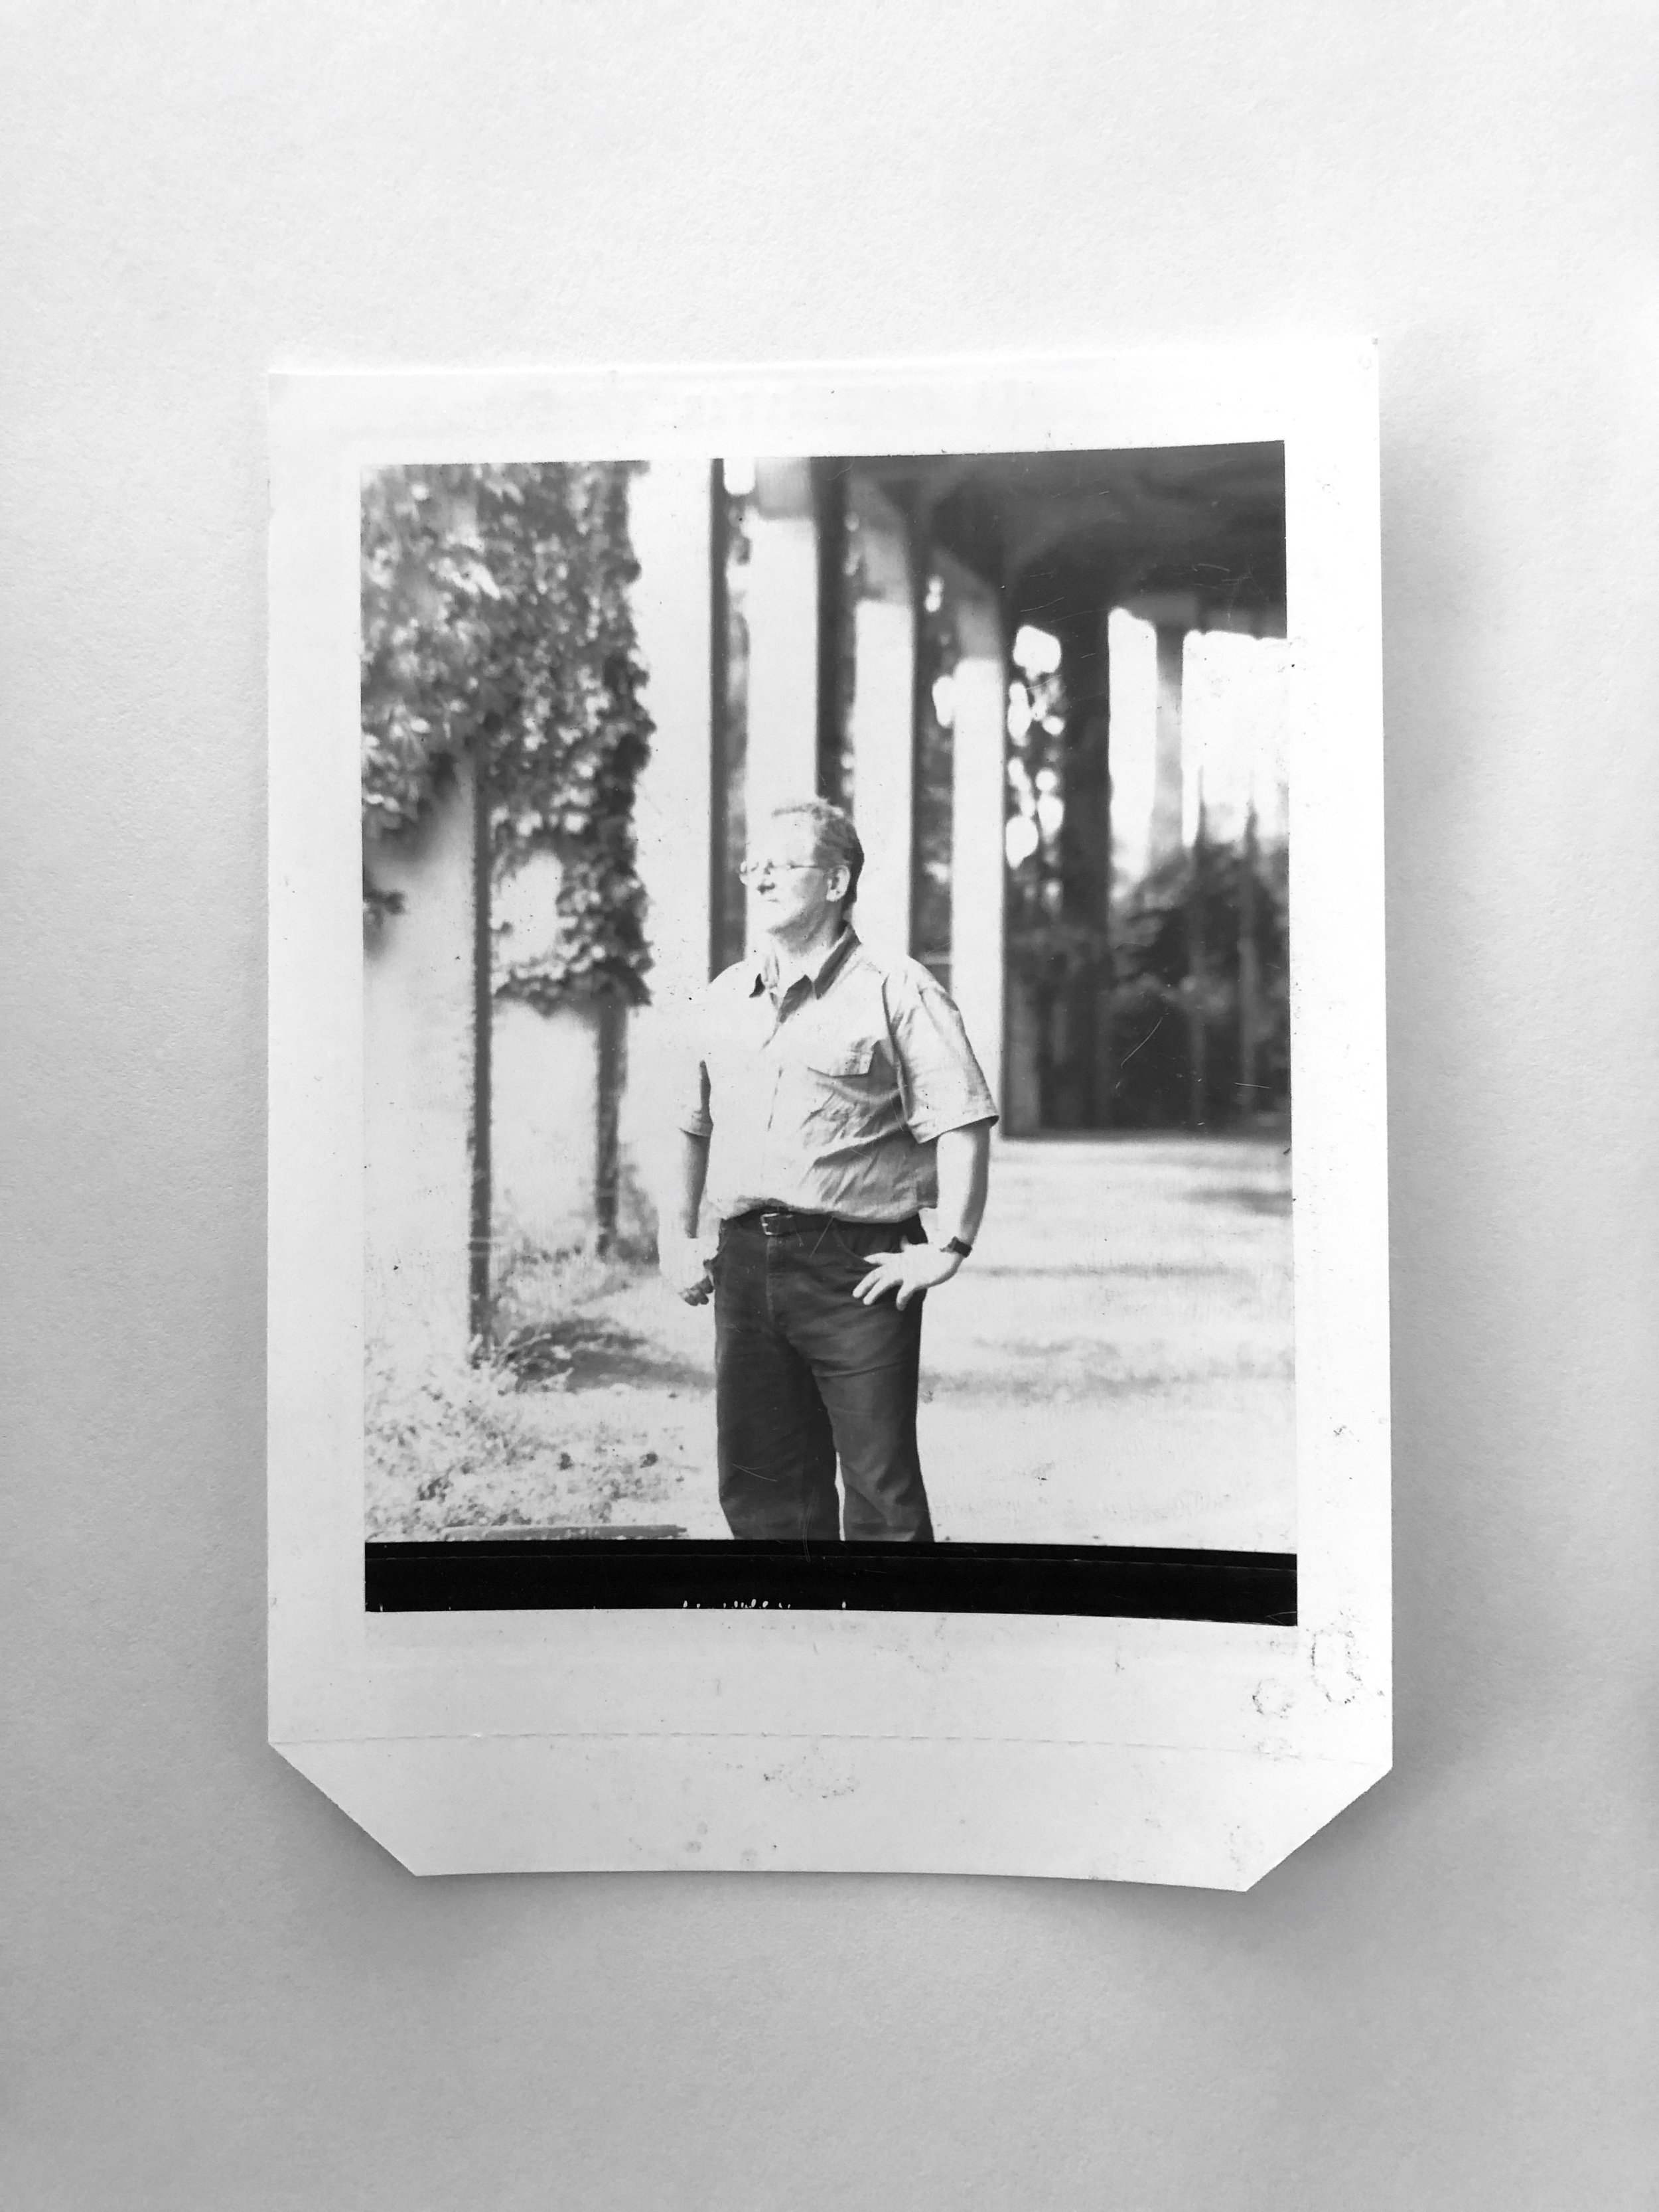
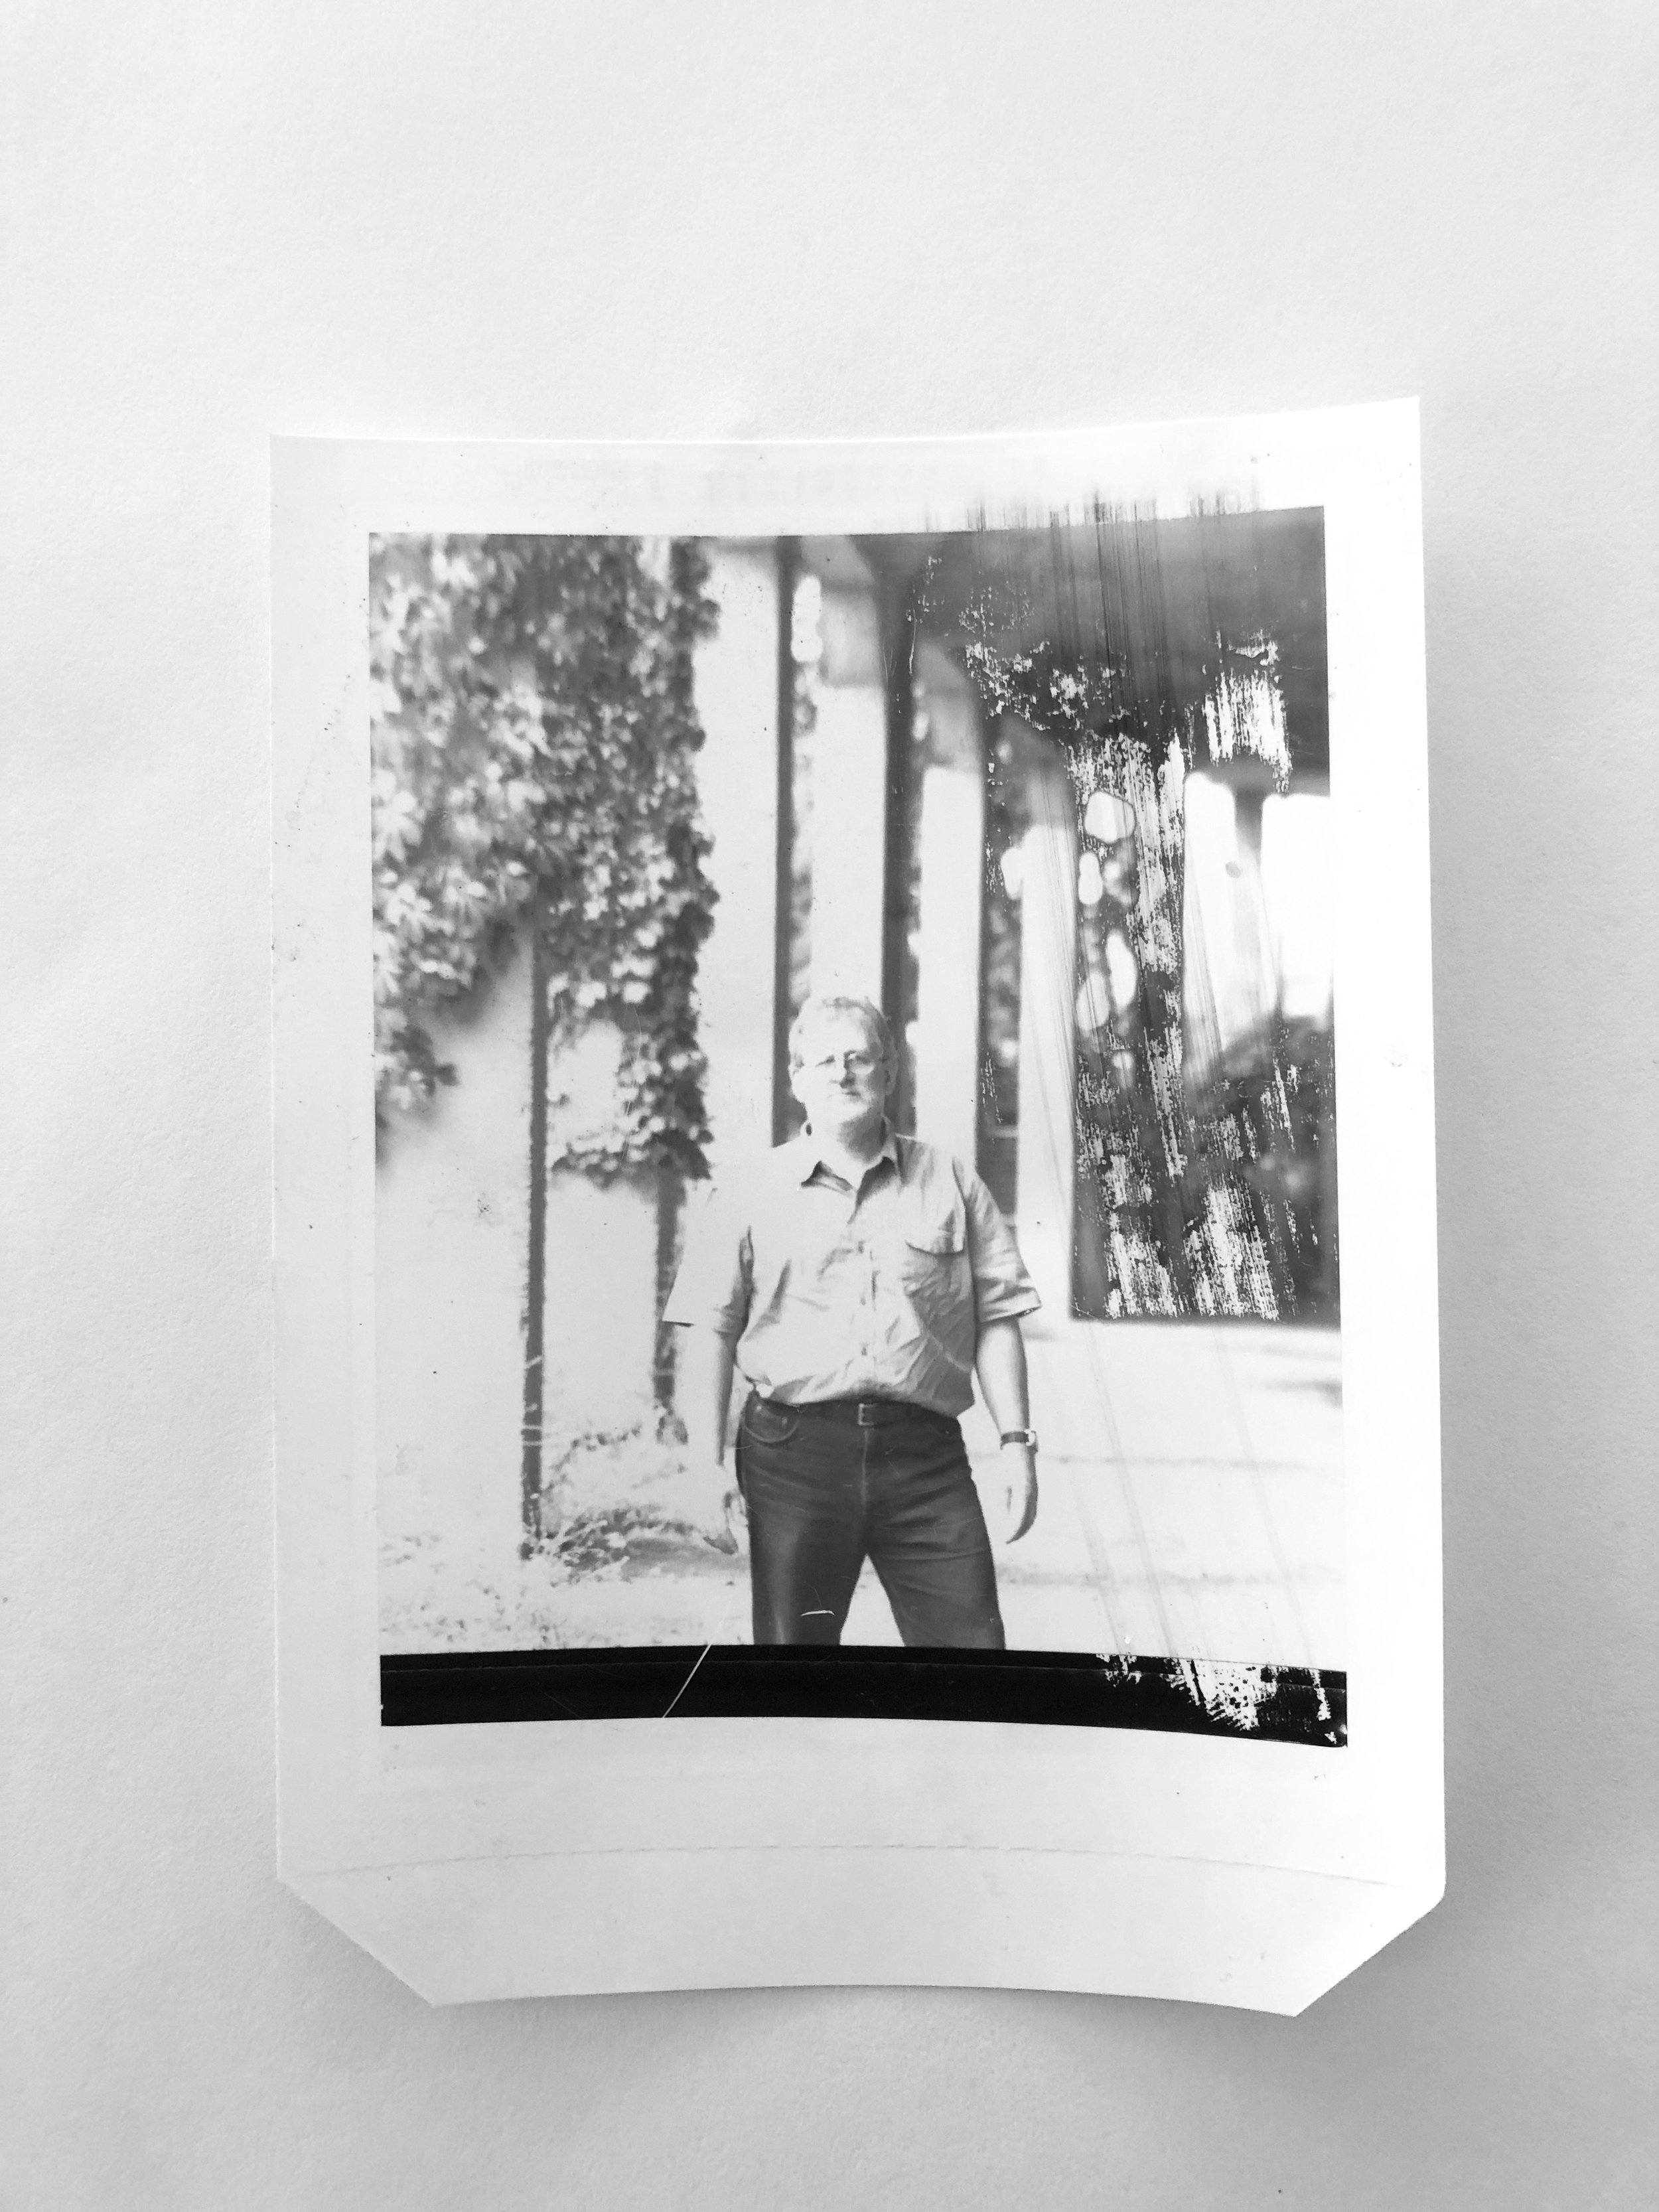
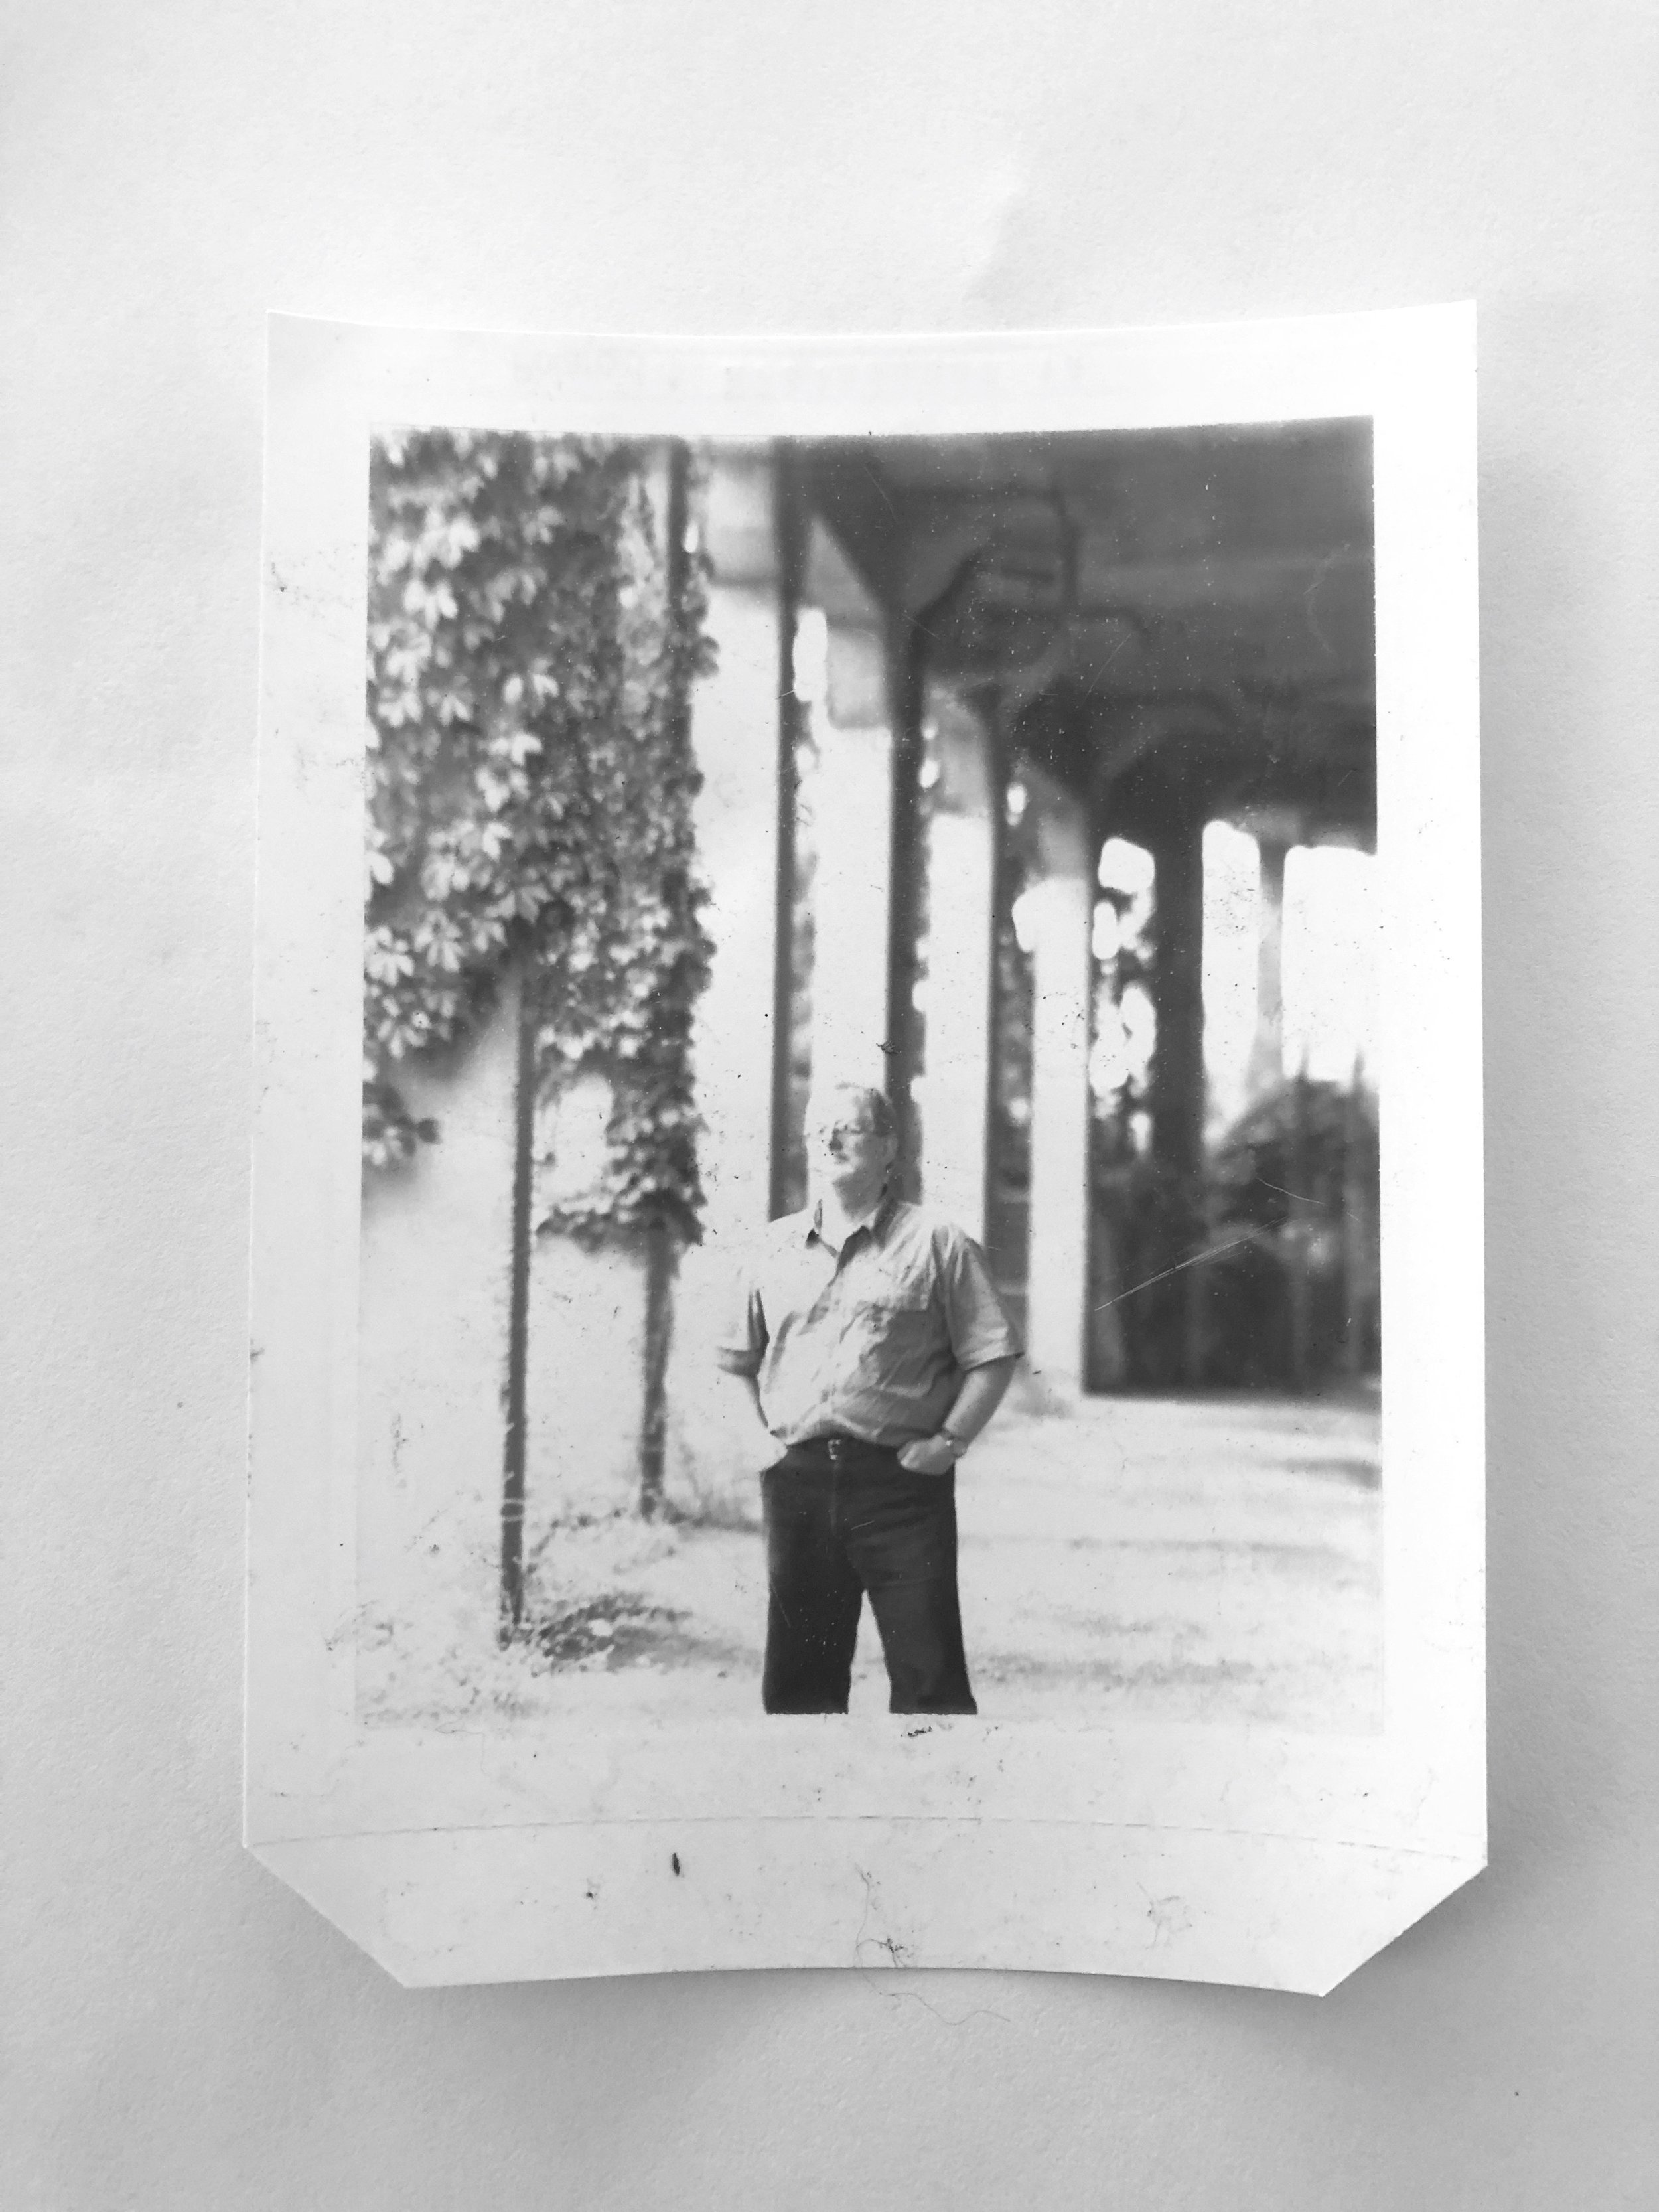
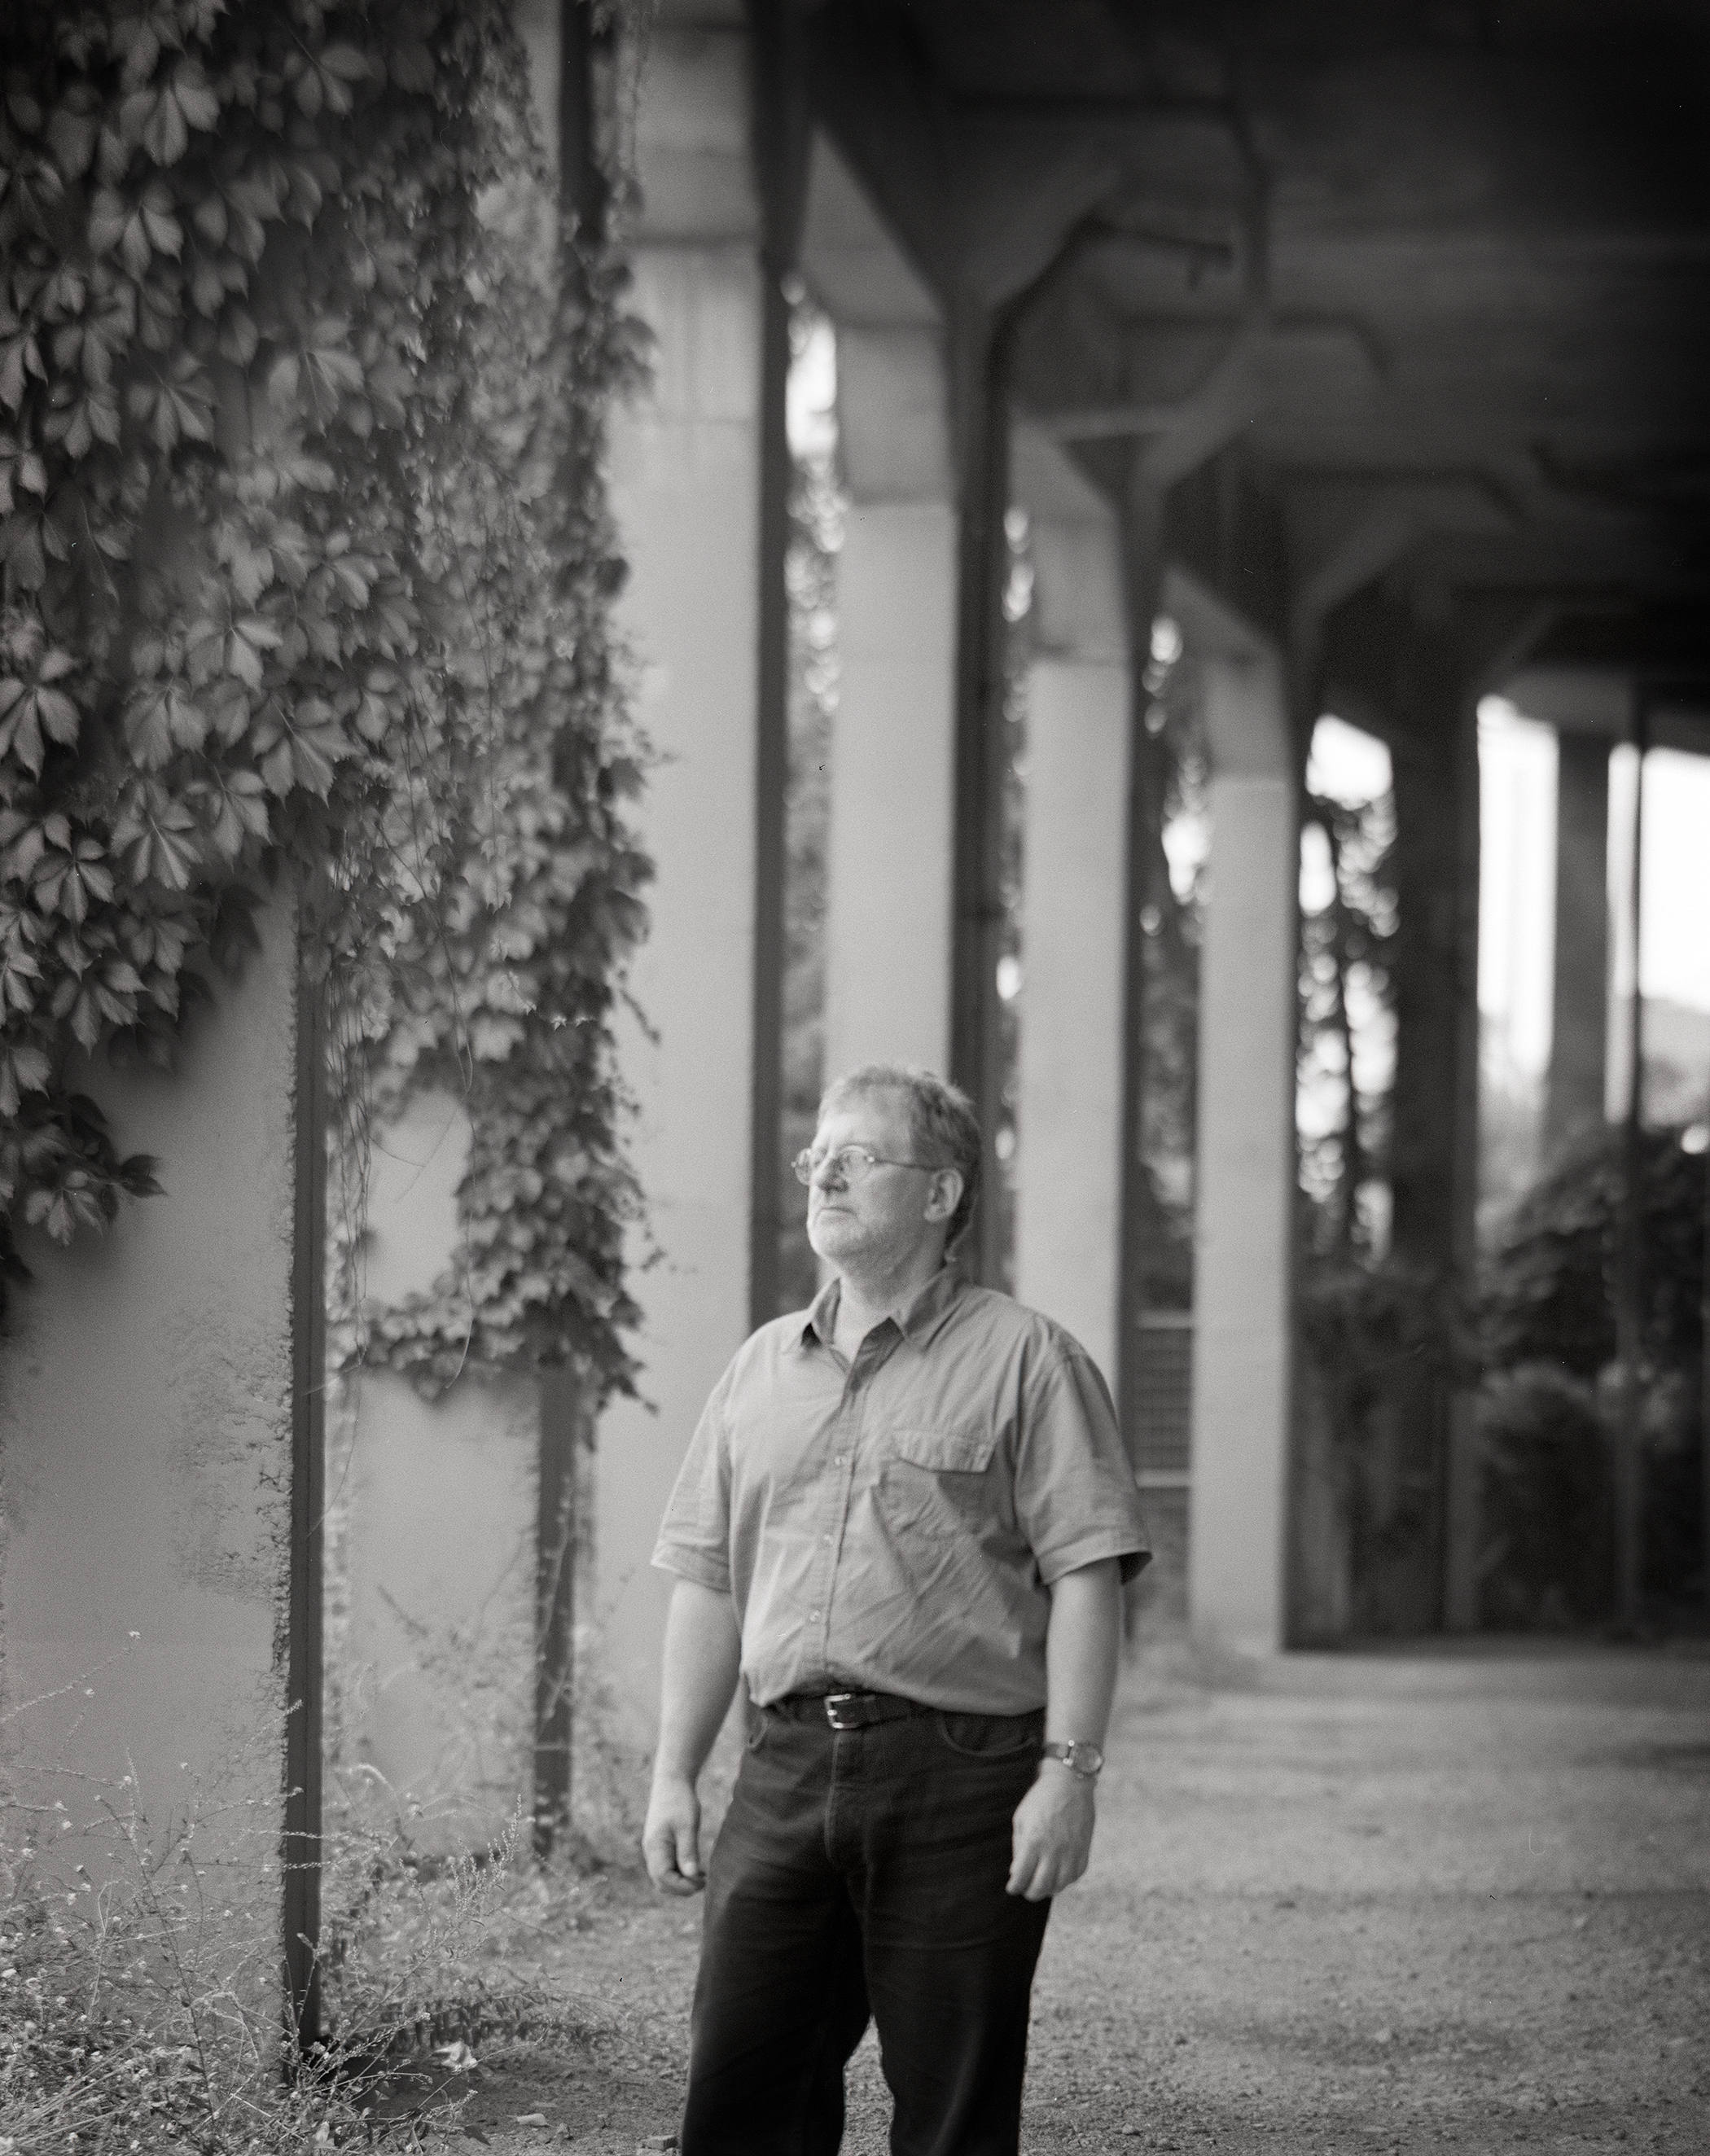

Once I got the film back my suspicions were confirmed the film was out of focus, was indeed soft. The image gallery (Fig. 1-6) on the right has the polaroids and the final image along with a cropped in version of it. The focus appears to be just in front of Mark, my subject. This is unfortunate as I went ahead and shot my first subject with the camera before I got the film back from the lab, so I am hoping that the images will be in focus and this was just a anomaly.
Reflection
This location is one that I would like to use, I like the background but I will position the subject in the centre of the roadway instead of offsetting them like I did with Mark. This centring of the subject is something that photographer Spencer Tunick does in his work, within his Individual Nude series, see Fig. 2, he uses of linear perspective to draw our eye up to the subject’s face by placing the subject at the vanishing point of the image, dead centre horizontally. His use of linear perspective reminds me of classical painting he is a photographer that recreates Renaissance-style paintings in modern settings throughout his work (Independent, 2008). The use of linear perspective and the vanishing point are most evident in the work of Raphael, his School Of Athens (FIg. 8) is a great example of this and Caspar David Friedrich’s The Wanderer is a great example from the Romantic period. These works remind me of the work of Urban and Phimester, (Fig. 11 & 12 below), two images I have been inspired by.
Another element I quite like from this test shoot is the vine on the column, it has also has a classical feel and helps further remind me of the work of Julia Margaret Cameron, her images of costumed people posed in landscapes and natural light (Artspace, 2013). The use of foliage is most evident in my favourite image by Cameron Ponoma, (Fig. 9). I think the use of foliage can help offset the urban concrete environment of the background and I do really like that the top of the frame is open, but not completely it has that sense of freedom but is enclosed which was what I am looking to do within these images.
Citations
Artspace (2013). Meet Julia Margaret Cameron, the Cindy Sherman of the Victorian Era. Available at: https://www.artspace.com/magazine/contributors/see_here/julia_margaret_cameron_cindy_sherman_of_the_victorian_era-51588 (Accessed: 05 July 2019).
Artsy. (2017) Caspar David Friedrich Wanderer above the Sea of Fog 1817 [Online image]. Available at: https://www.artsy.net/article/artsy-editorial-unraveling-mysteries-caspar-david-friedrichs-wanderer [Accessed: 21 July, 2019].
Independent (2018). I stripped for Spencer Tunick. https://www.independent.co.uk/arts-entertainment/art/news/i-stripped-for-spencer-tunick-920804.html [Accessed: 20 July, 2019].
Phimester, S. (2017) Jacqueline [Online image]. Available at: https://www.flickr.com/photos/sandyphimester/36817501613/ [Accessed: 25 July, 2019].
Machinski, J. (2019) Mark Test Shoot Polaroid 01. August 2019. Unpublished.
Machinski, J. (2019) Mark Test Shoot Polaroid 02. August 2019. Unpublished.
Machinski, J. (2019) Mark Test Shoot Polaroid 03. August 2019. Unpublished.
Machinski, J. (2019) Polaroid. August 2019. Unpublished.
Machinski, J. (2019) Mark Test Shot 01. August 2019. Unpublished.
Machinski, J. (2019) Mark Test Shot 01 Close UP. August 2019. Unpublished.
My Modern Met (2018) [Online image]. Available at: The Story Behind Raphael’s Masterpiece ‘The School of Athens’ https://mymodernmet.com/school-of-athens-raphael/ [Accessed: 22 July, 2019].
New York Magazine (1999). Julia Margaret Cameron, Ponoma, 1872 [Online image]. Available at: http://nymag.com/nymetro/arts/art/reviews/138/ (Accessed: 05 July 2019).
Phimester, S. (2017) Jacqueline [Online image]. Available at: https://www.flickr.com/photos/sandyphimester/36817501613/ [Accessed: 25 July, 2019].
Urban, A. (2017) Michelle [Online image]. Available at: https://www.flickr.com/photos/alex833/36373592033/ [Accessed: 24 July, 2019].
Interviews: MA Major Study Development
Recently finished conducting the three interviews from my previous module, I was able to photograph the subjects but not able to make the time to interview them. I used these interviews as a test to gauge my interview style and process. I was not initially sure what to ask as I have never really interviewed anyone before but I thought I would start with the basics, your name, when you migrated, country of origin and why you migrated.
The interviews I initially felt were important to the work as a still image does not really tell you much about a subject besides superficial elements, height, hair and eye colour etc.. So I concluded that the interviews would help give depth to the subjects and allow the viewer or reader of the work to connect with the subject more. If I was to display this in a gallery space I would include headphone at each image to allow for pieces of the audio interviews to play on repeat. Seeing and hear someone, I think, allows for a deeper connection. My parents both passed away and from cancer, my father first, and I was always disappointed that I never recorded his voice. I did with my mother and combining that with stills images helps humanize and build a deeper connection for me than just one of the mediums could ever do.
I have also decided on using this image when going over the synopsis:
Fig. 1: Portraits of My Paternal Grandfather & Family, Machinski (2018)
I show the subjects the two image on one sheet of paper and explain my family’s only migration story I know or at least the pieces of it I know. The smaller image on the left is a portrait of my paternal grandfather in Poland, it is worn and tattered and he is single, date of image I am not sure. The second image is paternal grandfather again in Canada with a wife and two kids most likely in 1949, given the age of my father in the picture. What I am curious about is what happened in-between, how and why did he leave Poland? This is a piece of my history that is lost and I think something that should not be forgotten by any family and I think by a community or a country. I also think photography and audio is a great way to capture these narratives, I have always liked what Diane Arbus said about photography for documenting subject, in her project American Rites, Manners and Customs, she want to gather them, like everybody's grandmother putting up preserves, because they will have been so beautiful. “ (Jeu de Paume, 2012)
synopsis: migration narratives
For as long as I can remember I have been fascinated by collecting, and people. From an early age, I collected, bugs, comics, etc., seeing items put together as a whole fascinated me. My other fascination is people, I love hearing people’s stories, who they are, where they came from and what makes them tick. I believe that listening to other’s stories, and sharing your own, leads to mutual understanding, friendship, and peace. I believe we are all, at our most basic level, looking for the same things.
For this project, I first became curious about my own family’s story of migration. Unfortunately, this story had been lost, my relatives who migrated have passed on and my family knows very little of this story. Migration I was told, was a thing to be forgotten and assimilation was key to acceptance into this new country. Next, I asked my friends who recently migrated to Canada and many were reluctant to tell me their migration stories. For me this was perplexing, migration, leaving your home and moving to a new country, is a pivotal point in a person’s and a family’s history, and something I think should be remembered and shared.
Since I began documenting these stories and researching migration I realize how harrowing these stories are, and how interconnected migration is to globalization, environmental issues, poverty, economic disparity, and violence. For me, although the research is enlightening, statistics and government policies are just words on a page. I want to make a human connection by documenting first hand the stories of people’s migration, to celebrate their struggles and achievements.
questions: migration narratives
What is your name?
Your age? (only if you mind sharing)
When did you migrate?
What country did you migrate from?
Tell me about the country you migrated from?
Tell me your migration story, why did you migrate to Canada, how did you get here?
What has your experience been like in Canada?
What do you hope for in this new country?
_____________________________
Jeu de Paume (2012) Diane Arbus Press Kit. Available at: http://www.jeudepaume.org/pdf/PR_DianeArbus.pdf [Accessed: 15 August, 2018].
Machinski, J. (2018) Portraits of My Paternal Grandfather & Family, Machinski. January 2018. Unpublished.
Migration: MA Major Study Research
“International migration has been a fundamental feature of nation-states since their emergence in the sixteenth century, and it is likely to continue to shape the economic, political, and social life of societies across the world in the twenty-first, regardless or because of the gyrations of world economic activity, the restrictionist stance of countless national, as well as regional and local governments, the hospitality of citizens, or the energy, determination, and wishes of migrants themselves” Samers, M. (2016)
Humans have been migrating for centuries, if not millennia, and will continue to do so. The world’s population that lives outside their country of origin does not exceed 3.5 percent, Samers, M. (2016). However, if we could look back at our families’ past, chances are you are a descendant of a migrant. Why do people have a fear of migrants?
“In many countries across the world, there is rise in nation- alism and an authoritarian and exclusionary form of populism, with political leaders once considered on the fringe of politics gaining power and influence. Such populism is often due to the backlash against the emigration of displaced per- sons, austerity and other social and economic divisions, inequalities and injustices in society.” (Tahzib, Davidovitch, & Labonte, 2019)
It seems that the wide inequalities around the world, and the clear injustices they represent within and between countries, are regrettable features of our era (Migration Data Portal 2019) and this has led to migration and feeling of animosity and fear of migrants.
Most of the reasons that people migrate are:
“The drive to seek better economic opportunities; family reunification; concerns about public security and criminality in migrants' country of birth; and to escape humanitarian crises, persecution, instability and war. All this is facilitated by lower international travel costs and easy availability of information, and sometimes misinformation, online and through social media about migration.” (House Of Commons, 2019)
Most people do not would not choose to migrate if they did not have to. Many experts in this field belief that migrants are people like you and me, seeking peace, and aspire to freedom and safety for themselves and for their families (House Of Commons, 2019).
Canada recognizes certain definition when it comes to migration,
Migrant - is an all-encompassing term that refers to any person who moves away from their home,26 either within their country of origin or across an international border, without taking into account the legal status of the person or the causes of migration.
Immigrant - specifically refers to those who enter a new country with the intent to settle.
internally Displaced Persons - are defined as individuals who have been forced to flee from their home, especially “as a result of or in order to avoid the effects of armed conflicts, situations of generalized violence, violations of human rights or natural or human-made disasters, and who have not crossed an internationally recognized State border.
Asylum Seeker - refers to any person asking for international protection and who is going through a refugee status determination process in a country other than their own country of origin.
Refugee - is an asylum seeker who received refugee status from the country where they claimed international protection or from the United Nations High Commission for Refugees.
(House Of Commons, 2019)
These terms are important to remember when talking with the project’s subjects. Also what their push or pull factors where at the time of their migration. Today there are more pull factors, namely the presence of a dual labour market in the richer countries that drives migration Samers, M. (2016).
Citations
Samers, M. & Collyer, M. 2016, Migration, 2nd edn, Taylor & Francis Group, London.
Tahzib, F., Davidovitch, N. & Labonte, R. 2019, "Migration, justice and health: Reimagining the earth as one country and humankind its citizens", Public Health, vol. 172, pp. 105-107. https://www-sciencedirect-com.ezproxy.herts.ac.uk/science/article/pii/S0033350619300976
Migration Data Portal (2019) The bigger picture Available at: https://migrationdataportal.org/themes/global-compact-migration [Accessed : 1 July, 2019]
House Of Commons (2019) Adapting Canada’s Immigration Policies To Today’s Reality, Report of the Standing Committee on Citizenship and Immigration. Available at: https://www.ourcommons.ca/Content/Committee/421/CIMM/Reports/RP10541650/cimmrp25/cimmrp25-e.pdf [Accessed : 5 July, 2019].
mr. b - at work #0003
At Work #0003
mr. b
We celebrated Bowie's retirement at the Grad Show this year, we knew he was retiring for over a year, but it has finally hit home. Bowie helped me print a client order this week at work and when he left then it hit me. It is sad to see him go, I have worked with Bowie for over ten years and I love the man. He has been a mentor, a teacher and a good friend and I will miss him. His bad puns and his great sense of humour was always appreciated. Everyone seemed to know him too.
Funny Bowie story, one day I got picked up by a courtesy shuttle to get my car at the dealership service centre. The driver was very friendly we talked and he asked me where I worked, I said the Photography Program at Algonquin. His response, o you must know Michael Bowie. Classic Bowie moment, which happens often. The man seems to know everyone, he was even the first person to tell me my sister's brother-in-law passed away. Neither of them lives in Ottawa by the way so he seems to know everyone everywhere.
Bowie, you are already missed I wish you all the best on your next adventure.
____________
At Work is a journal of my adventures at work. These image(s) above were shot using the Olympus PEN-FT, read more about this amazing half-frame camera here.


