Paper: MA Major Study Development

In Post Banner  paper.png

One thing I am not prepared to do at this point in my practice is develop film or paper. I do not have the time or the facilities to properly process either. Also it has been my observation through my years in the industry that, as far as gelatin silver prints, digital printing and editing has far surpassed the quality and control of darkroom printing. Another reason is size, I would like to produce large scale images and anything beyond 48” inches digital onto inkjet (PetaPixel, 2017) is the best option. The quality is better, it is cheaper, and you have more control in the digital editing process. The people within the images are going to be printed near live size, I want them to be engaging and confront the viewer.

Figure 1: Paper Choices (Source: Machinski, 2019)

Figure 1: Paper Choices (Source: Machinski, 2019)

The one paper I do want to work with is a fibre based paper as it is thicker and it reminds me of fibre based silver gelatin paper I used to use in the darkroom. I recently did some testing printing on a assortment of fibre rag papers, Canson Platine Fibre Rag, Epson Exhibition Fibre, Hahnemuhle Baryta Glossy, and Hahnemuhle Baryta Satin they all have gsm of about 300 a nice thicker paper stock.

I decided on the Hahnemuhle Baryta Glossy I like the finish and this like fibre based papers silver gelatin papers it has a barium-sulphate gelatin applied to the paper ground to produce purer whites and richer blacks and is archival, The Getty Conservation Institute (2018).

Figure 2; 44x54 Baryta Glossy Print for the Migrant Narrative Show (Source; Machinski, 2019)

Figure 2; 44x54 Baryta Glossy Print for the Migrant Narrative Show (Source; Machinski, 2019)


Citations

The Getty Conservation Institute (2018) The Atlas of. Available at: https://www.getty.edu/conservation/publications_resources/pdf_publications/pdf/atlas_silver_gelatin.pdf [Accessed on: 17 Aug, 2019]

Parallax Photographic Coop. (2016) The Difference Between Resin Coated And Fibre Based Paper. Available at: https://parallaxphotographic.coop/the-difference-between-resin-coated-and-fibre-based-paper/ [Accessed on: 17 Aug, 2019]

Machinski, J (2019) 44x54 Baryta Glossy Print for the Migrant Narrative Show (Unpublished).

Machinski, j (2019) Paper Choices (Unpublished).

Nickelson, J. 2017, Fine Art Inkjet Printing, Rocky Nook.

PetaPixel (2017). An Interview with Edward Burtynsky. Available at: https://petapixel.com/2017/04/13/interview-edward-burtynsky/ [Accessed on: 17 Aug, 2019]


Hanging Prints: MA Major Study Development

In Post Banner  scan & pri.png

The video below is process video on how to hand a large scan vinyl image along with my rationale for going with large format output for this particular series. Along with a comparison of the quality of a Howtek vs. an Epson scanner.

This is a video of my process for scanning and printing large format negatives. This video is a follow up to the Howtek Scan Master 4500 drum scanner and Epson V750 scanner video. Within the video I critique the prints from the Epson 9900 printer and the HP 110 Latex printer.

Gallery: MA Major Study Research

In Post Banner  gallery.png

Initially I did not want to show the work in a gallery space opting for a more street level performance style presentation of the work.  I have always been fascinated by the work of photographer JR and the way he has fused street art and graffiti into his practice.   He calls himself a “photograffeur," (NPR, 2010) a photo graffiti artist as he uses wheat paste and inexpensive prints to post his photographs onto buildings and walls.

Figure 1: JR 28 Millimeters, Women Are Heroes, Rio de Janeiro, Brésil, (Source: JR, 2008).

In previous modules I have used wheat paste and vinyl to post my images onto structures and buildings in Ottawa. Eventually ending up using a combination of vinyl prints on wood to allow me to place the images quickly onto the street, the images were also not permanent. Ottawa has an anti-graffiti law making it the owner of buildings responsibility to remove graffiti in a timely manner or they will get fined.

“The By-law requires that property owners remove graffiti from their property within a minimum of 7 days after receiving notice from the City. If a property owner chooses not to remove the graffiti within the specified time frame, contractors may be hired by the city to remove the graffiti. Associated costs will be added to the property owners’ municipal tax bill.” City Of Ottawa 2019

This is not something that I wanted to burden property owners with so any large scale display of my work would have to be in collaboration with property owners or I would be limited to smaller scale work.

Figure 2: Examples of Pasted Street Portrait (Source: Machinski J., 2018).

Figure 2: Examples of Pasted Street Portrait (Source: Machinski J., 2018).

Creating street art pieces of my work I like impermanence of the media the work get removed within a few days and was wondering if there was a way to create pop shows of my work. That is when I stumbled upon projection and projection mapping, this uses LCD projectors to digitally display images onto building and structures. Since this form of display is not permanent and it does not conflict with the City By-Law and my work could be displayed in a very large format, see Figure 3 & 4 for an example. Most recently I have been experimenting with VPT 8 software which does projection mapping, which would allow me adapt a projection to a particular space/surface (HC Gilje blog, 2019). This would also allow me vertically correct the images and produce complex displays of my work using multiple images and text. I like this idea of doing pop up shows of my work but I think that I might use this as a promotion for an actual showing of the work. So I began to look for venues in town for a possible showing of the work.

Studio Sixty Six in Ottawa is a contemporary art gallery that hosts curated show and allows for  rental of the space for self-hosted shows.  I have been to a number of shows within the space and really like the venue and the location.  It is located in the heart of the Glebe in downtown Ottawa and it has the space to properly display the size of prints that I want to produce, 44x54 inch smaller prints and 88x108 inch wall wraps. There are two areas within the space that would facilitate the display of the 88x108 inch print’s viewing distance of 17 feet. The smaller 44x54 inch prints would also have a proper viewing distance in the remainder of the gallery walls as the distance is 12 feet in depth, see floor plan and 3D renders, Figure 5-7.

Currently I am at the initial stages of planning this and have asked for costing of renting the space and availability. I have produced a number of the smaller prints and a large 88x108 inch wall wrap that would hang in the space.

Citations

Abrishami, A. (2019) Floor Plan Studio Sixty Six. June 2019. Unpublished.

JR. (2008) 28 Millimeters, Women Are Heroes, Rio de Janeiro, Brésil. [Photograph] Available at: https://www.jr-art.net/projects/women-are-heroes-brazil [Accessed 27 July 2019]  

Machinski, J. (2018) Examples of Pasted Street Portrait. December 2018. Unpublished.

Machinski, J. (2018) Studio Sixty Six Floor Plan 3D Render. August 2019. Unpublished.

Machinski, J. (2018) Studio Sixty Six Floor Plan 3D Render. August 2019. Unpublished.

NPR. (2010). Anonymous 'Photograffeur' Wins One Wish To Change The World ... And $100K. [Online] https://www.npr.org/sections/pictureshow/2010/10/21/130727951/tedprize [Accessed 1 July 2019]

City Of Ottawa (2019) Graffiti Program. Available at: https://ottawa.ca/en/residents/water-and-environment/green-living/graffiti-program#graffiti-law [Accessed 12 June 2019]

VPT 8 (2018) Conversations with spaces. Available at: https://hcgilje.wordpress.com/vpt/ [Accessed 12 August 2019]

Wu, M. (2018) Land and Memory. [Photograph] Available at: https://photogmusic.com/landmemory-studiosixtysix/ [Accessed 12 August 2019]

Posing: MA Major Study Development

In Post Banner  posing.png

While re-reading Heisler’s book I came across this line:

“I couldn't possibly have told him to stand the way he stood, he weight shifted just so, like an artist's model demonstrating contrapposto.” Heisler, G. (2013)

Figure 1: Michelangelo’s David (Source: Academia.org)

I liked the image so my interest was peaked, what was contrapposto was and how I could incorporate that into my posing repertoire.

Conrapposto is a posing style that is used in sculpture, one fo the best examples is Michelangelo’s David, conrapposto make the subject look more natural as if they are taking a step forward. (Khan Academy, 2019). I like the idea of placing my subject on the road or pathway to represent movement. So to further emphasis this I plan on using this technique to make them appear like they are in motion as well. I like that this will also be a metaphor for migration which is movement too.

I also found this great resource, CreativeLive (2019).

  1. Creating separation- Move the subject’s arms and legs to allow for negative space, lines, and triangles around the body. Lines and spaces help the eye move around the frame. In addition to appearing slimmer, the model will look like he or she is in the middle of doing something instead of just standing still.

  2. Tucking the arms in - Move the arms back far enough to hide the upper arm. This allows the elbows to cinch the waist a bit. This position makes the subject look whimsical, like they’re in a fairy tale.

  3. Forcing the chin away from the neck - Lean the head back and push the neck out. This pose creates a straighter line under the neck and helps your subject look alert and purposeful.

  4. Arching the back - Exaggerating an arched back defines the waist, creates negative space, and adds tension and implied motion.

  5. Dropping the shoulders - Ask your model to take a deep breath and relax his or her shoulders. With the shoulders dropped, the neck is elongated. The pose looks elegant and encourages better posture.

  6. Tilting the head back - Define the jawline and elongate the neck by tilting your subject’s head back so he or she is looking up. The viewer is left wondering what the subject is looking at, and the model looks engaged in the scene.

  7. Pulling the arms back - Add tension, alertness, and implied motion to your images by asking your models to thrust their arms back behind them. This results in a more dynamic, storytelling pose.

    Another great resource for posing is this book:

    Valenzuela, R. 2014, Picture Perfect Posing: Practicing the Art of Posing for Photographers and Models, 1st edn, New Riders.

Citations

Academia.org (2019. Michelangelo’s David Available at: http://www.accademia.org/explore-museum/artworks/michelangelos-david/ [Accessed on: 1 Aug, 2019]

Heisler, G, 2013. 50 Portraits Stories and Techniques From A Photographer's Photographer. 1st ed. New York: Amphoto Books.

Khan Academy. (2019). What is contrapposto Dr. Steven Zucker and Dr. Beth Harris. Available at: https://www.khanacademy.org/humanities/art-history-basics/tools-understanding-art/v/contrapposto [Accessed on: 1 Aug, 2019]

Tobin, R. 1975, "The Canon of Polykleitos", American Journal of Archaeology, vol. 79, no. 4, pp. 307-321. https://www-jstor-org.ezproxy.herts.ac.uk/stable/503064?pq-origsite=summon&seq=2#metadata_info_tab_contents

CreativeLive (2019) 10 Basic Posing Techniques for Fine Art Portraits. Available at:https://www.creativelive.com/blog/10-basic-posing-techniques-fine-art-portraits/ [Accessed on: 1 Aug, 2019]


Lighting: MA Major Study Development

In Post Banner  lighting.png
Figure 1: Without Flash (Source: Machinski, 2019)

Figure 1: Without Flash (Source: Machinski, 2019)

Up to this point I have not used flash with my view camera on location, within my proposal for this module I decided to use flash for this series of images. I use the zone system for ambient exposure, using a spot meter to read and record all the exposure values in a scene and assign a zone to them. Adams, A.,& Baker H. R., (1981). This is used to assess the dynamic and texture range of a scene and to set my exposure, Adams, A.,& Baker H. R., (1981). Through research and experimentation I found using that the zone system could still be applied to my exposure metering formula.

Initially I did a test with a digital camera setting up my Elinchrom Ranger pack with one light. Boosting the output of the flash two stops higher than the ambient light I was able to overpower the flash and gain a correct exposure. I was shooting in a low light situation and wanted to keep my shutter speed low to let in the available light register.

“So your f-stop camera control is like a rheostat for your flash exposure. Again, the shutter speed has no effect, because the flash is just an instanteaneous burst of light. The shutter speed becomes a rheostat for the ambient light, independent of the flash. So if I have f/8 storbe light falling on my subject, the background can be at any of a wide range of shutter-speeds without affecting it.” Heisler, G, (2013)

Figure 2: With Flash (Source: Machinski, 2019)

Figure 2: With Flash (Source: Machinski, 2019)

This was a very harsh light as the flash was too powerful and aimed directly at the subject. So I started to feather the to achieve a softer effect, because in its own way, it causes the light to wrap around and act its own fill. It is also a way to emphasize the subject. Heisler, G, (2013). I was also fighting the available light at first because I was not thinking about where the natural light was coming from, placing the strobe so that it follows the direction of the natural light Leibovitz, A., (2008). Created a more natural light look but emphasizes the direction of the natural light Leibovitz, A., (2008).

One thing I did find funny's about this process was initially I thought the use of flash would let me shoot anywhere but using direct flash in direct sun looks unnatural. The best time to shoot is an overcast day, or at the beginning or the end of the day, when light are low and the tones are most even Leibovitz, A., (2008). This is much like shooting available light but the look is quite a bit different.

Figure 3: Flash Unit Setup (Source: Baylin, 2019)

Figure 3: Flash Unit Setup (Source: Baylin, 2019)

In Figure 4 there is a side by side comparison of a image with flash and without. The image with flash I can adjust the overall contrast without affecting the subject. The image without flash is very much tied to the exposure of the background. So when editing I could hardly change the contrast without drastically effecting the subject. This is another benefit of using flash.


Citations

Figure 4: Sandra No Flash and Flash, (Source: Machinski, 2019)

Figure 4: Sandra No Flash and Flash, (Source: Machinski, 2019)

Adams, A., Baker H. R., 1981. The Negative. 12 th ed., Bulfinch Press.

Heisler, G, 2013. 50 Portraits Stories and Techniques From A Photographer's Photographer. 1st ed. New York: Amphoto Books.

Leibovitz, A., 2008. At Work. 1st ed. New York: Random House.


Scan & Print: MA Major Study Development

In Post Banner  scan & pri.png

Below is a video detailing my scanning and printing process for the series, migrant narratives. Within the video I detail my research into scanning large format negs, and my process along with outputting them to an inkjet and a latex printer.

This is a video of my process for scanning and printing large format negatives. Within the video I compare a Howtek Scan Master 4500 drum scanner to an Epson V750 scanner. I use SilverFast scanning software and output the files to an Epson 9900 printer and an HP 110 Latex printer producing two prints, a 44'x54" and a 88"x108" respectively.

Scanning: MA Major Study Research

In Post Banner scanning.png

Initial Calculations

While using film within your photographic practice you inevitably get to the question, what do I do with the film once it is processed? The two options I contemplated were printing them in a darkroom using a traditional gelatin silver based process or scan the film and print digitally. I decided on the latter option, digital printing, as the cost to setting up a darkroom is expensive and there are no longer any darkroom rental facilities available in my area. Also having taught both print and digital printing I appreciate the advantages of the digital editing process. Scanning on the other hand is something I have done very infrequently and have never given much thought too. As such this was an area of the process that I wanted to explore as I have never been completely satisfied with the result I have obtained previously.

There are many ways to scan or digitize film, you can scan it using an assortment of different devices or photograph the film with a digital camera. The two methods of digitizing my negatives I have been exploring are scanning the negatives with an Epson V750 flatbed scanner and photographing them with a Canon 5D Mark III digital camera. The reason I decided on these two processes was they are commonly used, from a monetary perspective they are not expensive, and they are purported to give excellent results. This write up will look at my calculations for scanning on the Epson V750 flatbed scanner.

PRINT SIZE

Before I began digitizing the negatives I decided on a print output size, the film I am scanning is 4x5 black and white negative film. There is an art to scanning but simple formulas can help you decide how much resolution you need for different types of images (Fraser, 2009). So I am going to use a number of different formulas below that I have used for years to figure out, viewing distance of the print, and resolution.

I am going to print on two different devices an Epson Pro 9900 printer which has a maximum width of 44 inches. The second is the HP Latex 110 printer that has a maximum width of 54 inches, but the RIP software will allow me to tile and print the images on multiple vinyl wall wraps. So for the Epson I am going to print images 44x54 inches wide and on the HP I plan to double the size of the image and print on two vinyl panels, 88x108 inches wide. I want to make sure that the dimensions of the potential gallery space will allow for such a large print (See Print Viewing Distance below).

_____________________________________

PRINT VIEWING DISTANCE

There is two different sizes that I would like to print 44"x54" and 88"x108" prints.

88"x108" prints have an optimal viewing distance of 17.41' feet

44"x54" prints have an optimal viewing distance of 8.7' feet

The formula below is my calculations to determine the optimal viewing distance for the prints. The formula calculates the diagonal length of the print, then the diagonal length allows me to calculate the optimal viewing distance.

44"x54" Print

44 squared is 1936 x 54 squared is 2916

(1936 + 2916) = 4852

Square root of 4852 = 69.66" which is the diagonal length of the print.

Formula For Optimal Viewing Distance Of Print

69.66" x 1.5 = 104.5" or 8.7 feet

88"x108" Print

88 squared is 7744 x 108 squared is 11664

(7744 + 11664) = 19408

Square root of 19408 = 139.31" which is the diagonal length of the print.

Formula For Optimal Viewing Distance Of Print

139.31" x 1.5 = 208.97" or 17.41 feet

The gallery space, Studio Sixty Six, will only support two image at 88"x108" inches as there is only two spaces with that viewing distance depth. The space will also allow for proper viewing of the 44”x54” prints. My other concern is the resolution needed to scan the image. I know that at 24" inches the minimum print resolution needed is 143 dpi to provide the illusion of continuous tone to an observer with 20/20 vision (Fraser Image Sharpening). This is a base level of dots per inch needed but I would like the image to be appear to be a continuous tone at a closer range (see Image Resolution and Resolution For Scanning below for the calculations).

_____________________________________

IMAGE RESOLUTION

The Epson printers maximum dpi (dots per inch) is 1440 (Epson, 2019) and the HP is 1200 (HP, 2019). The ppi (pixels per inch) resolution of images printer print at can be no better than half the specified dpi of the printer (Clarkvision, 2013). This translates into a maximum ppi of 720 and 600 respectively for each printer. From years of testing I know I can print all my images at half of that so I use 360 ppi half of Epson's pixels per inch.


_____________________________________

RESOLUTION FOR SCANNING

Knowing that I plan to print at 360 ppi and output at 88x108 inches, I use this formula to figure out my scanning resolution.

88"x108" Print

(88x360) = 31680

(108x360) = 38880

Using the longest dimension of the negative to determine the scanning resolution:

38880/5 = 7776 dpi


44"x54" Print

(44x360) = 15840

(54x360) = 19440

Using the longest dimension of the negative to determine the scanning resolution:

38880/5 = 3888 dpi


_____________________________________

The Epson V750 Flatbed Scanner has a maximum resolution of 4800 dpi (Epson Scan, 2019) it will not scan at 7776 dpi for the 88"x108" prints. So I will have to interpolate the image, which will add information that does not exsist in the orignial image (Fraser, 2003) or decrease the resolution of the image to get a print of that size. This I will have to test and see if it will work or I can scan for the 44"x54" print size.

Citations

Burke, A. (2017) Drum vs Flatbed Scanner - Side by Side Comparison. Available at: https://www.alexburkephoto.com/blog/2017/12/15/drum-vs-flatbed-scanner-side-by-side-comparison [Accessed 04 August 2019]  

Clark Vision. (2013) ppi of Printer . Available at: https://clarkvision.com/articles/printer-ppi/ [Accessed 04 August 2019]

Kennedy, S. (2018) Epson V750 for 4×5 or Drumscan?. Available at: http://www.simonkennedy.net/blog/architectural-photography-2/4x5-flatbed-vs-drum-scan/ [Accessed 04 August 2019]  

Epson (2019) Epson 9900 Printer Specs. Available at: https://files.support.epson.com/pdf/pro79_/pro79_ug.pdf [Accessed 01 August 2019]

Epson Scan (2019) Epson V750 Specs. Available at: https://www.filmscanner.info/en/EpsonPerfectionV750Pro.html [Accessed 03 August 2019]  

HP (2019) HP 110 Latex Printer Specs. Available at: http://h10032.www1.hp.com/ctg/Manual/c04721790 [Accessed 01 August 2019]   

Fraser, B. (2009) Real World Image Sharpening with Adobe Photoshop, Camera Raw, and Lightroom [Online] Available at: https://bookshelf.vitalsource.com/#/books/9780321679369/cfi/6/8!/4/704/2@0:0 [Accessed 01 August 2019]

Watson, K. W., (2019) All About Scanning Photos. Available at: http://www.rideau-info.com/photos/scanning.html [Accessed 03 August 2019]  

Photographing Negs: MA Major Study Research

In Post Bannerphoto negs.png

Another way of digitizing your film is using a digital camera, this technique I discovered while taking an online class Douglas Kirkland on Photography: Shooting with an 8x10 Camera. Kirkland explains his process, he uses a copy board stand to mount the DSLR camera pointing down, the negative is laying on a daylight corrected lightbox, and he uses a 50mm macro lens.

Douglas Kirkland on Photography: Shooting with an 8x10 Camera (Source: LinkedIn Learning, 2019)

Douglas Kirkland on Photography: Shooting with an 8x10 Camera (Source: LinkedIn Learning, 2019)

My initial calculation is that printing at 1440 dpi (Epson Manual), the resolution of the Epson 9900, my maximum print size would be 4"x2.6". The formula for this calculation is:

22.3 effective megapixels 5760x3840 of Canon 5D MK III Sensor (Canon, 2019), divided by maximum resolution of Epson 9900 printer 1440.

5760 / 1440 = 4

3840 / 1440 = 2.6

______________

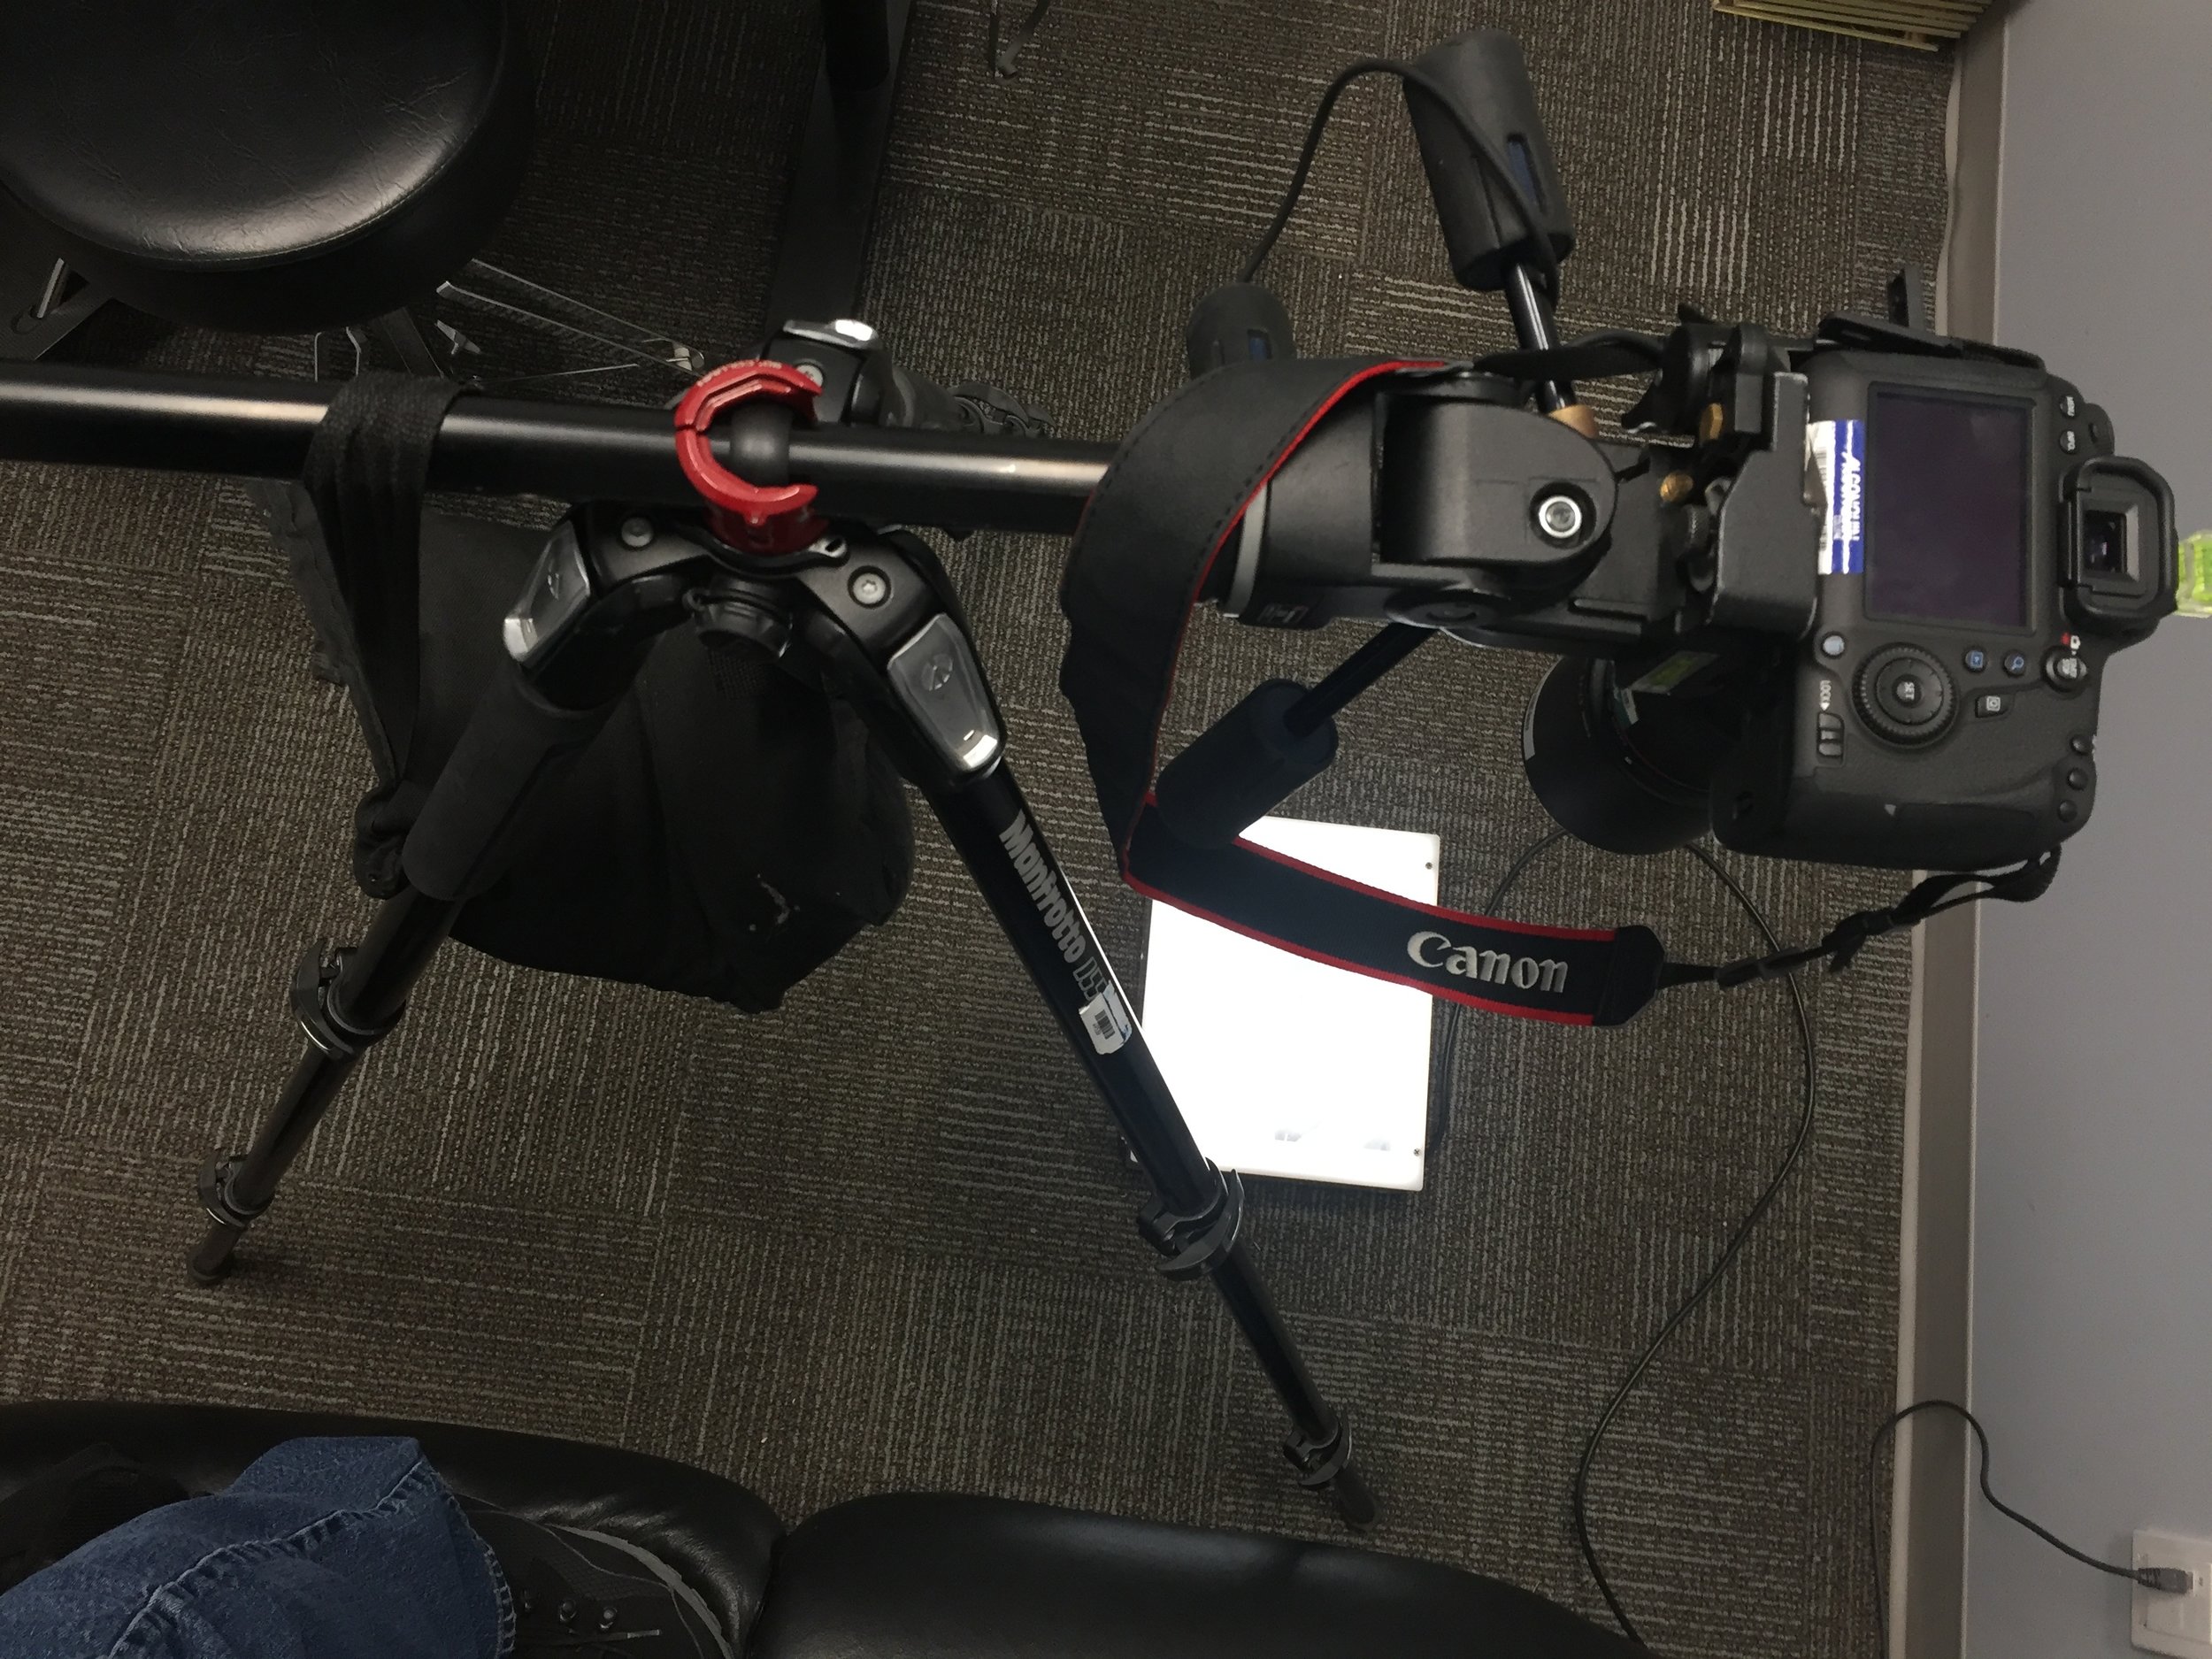
This is a concern bout I thought I would try and see for myself. At the time I was photographing 8x10 film. The equipment I used to photograph the film:

  • -Tripod with horizontal camera mount

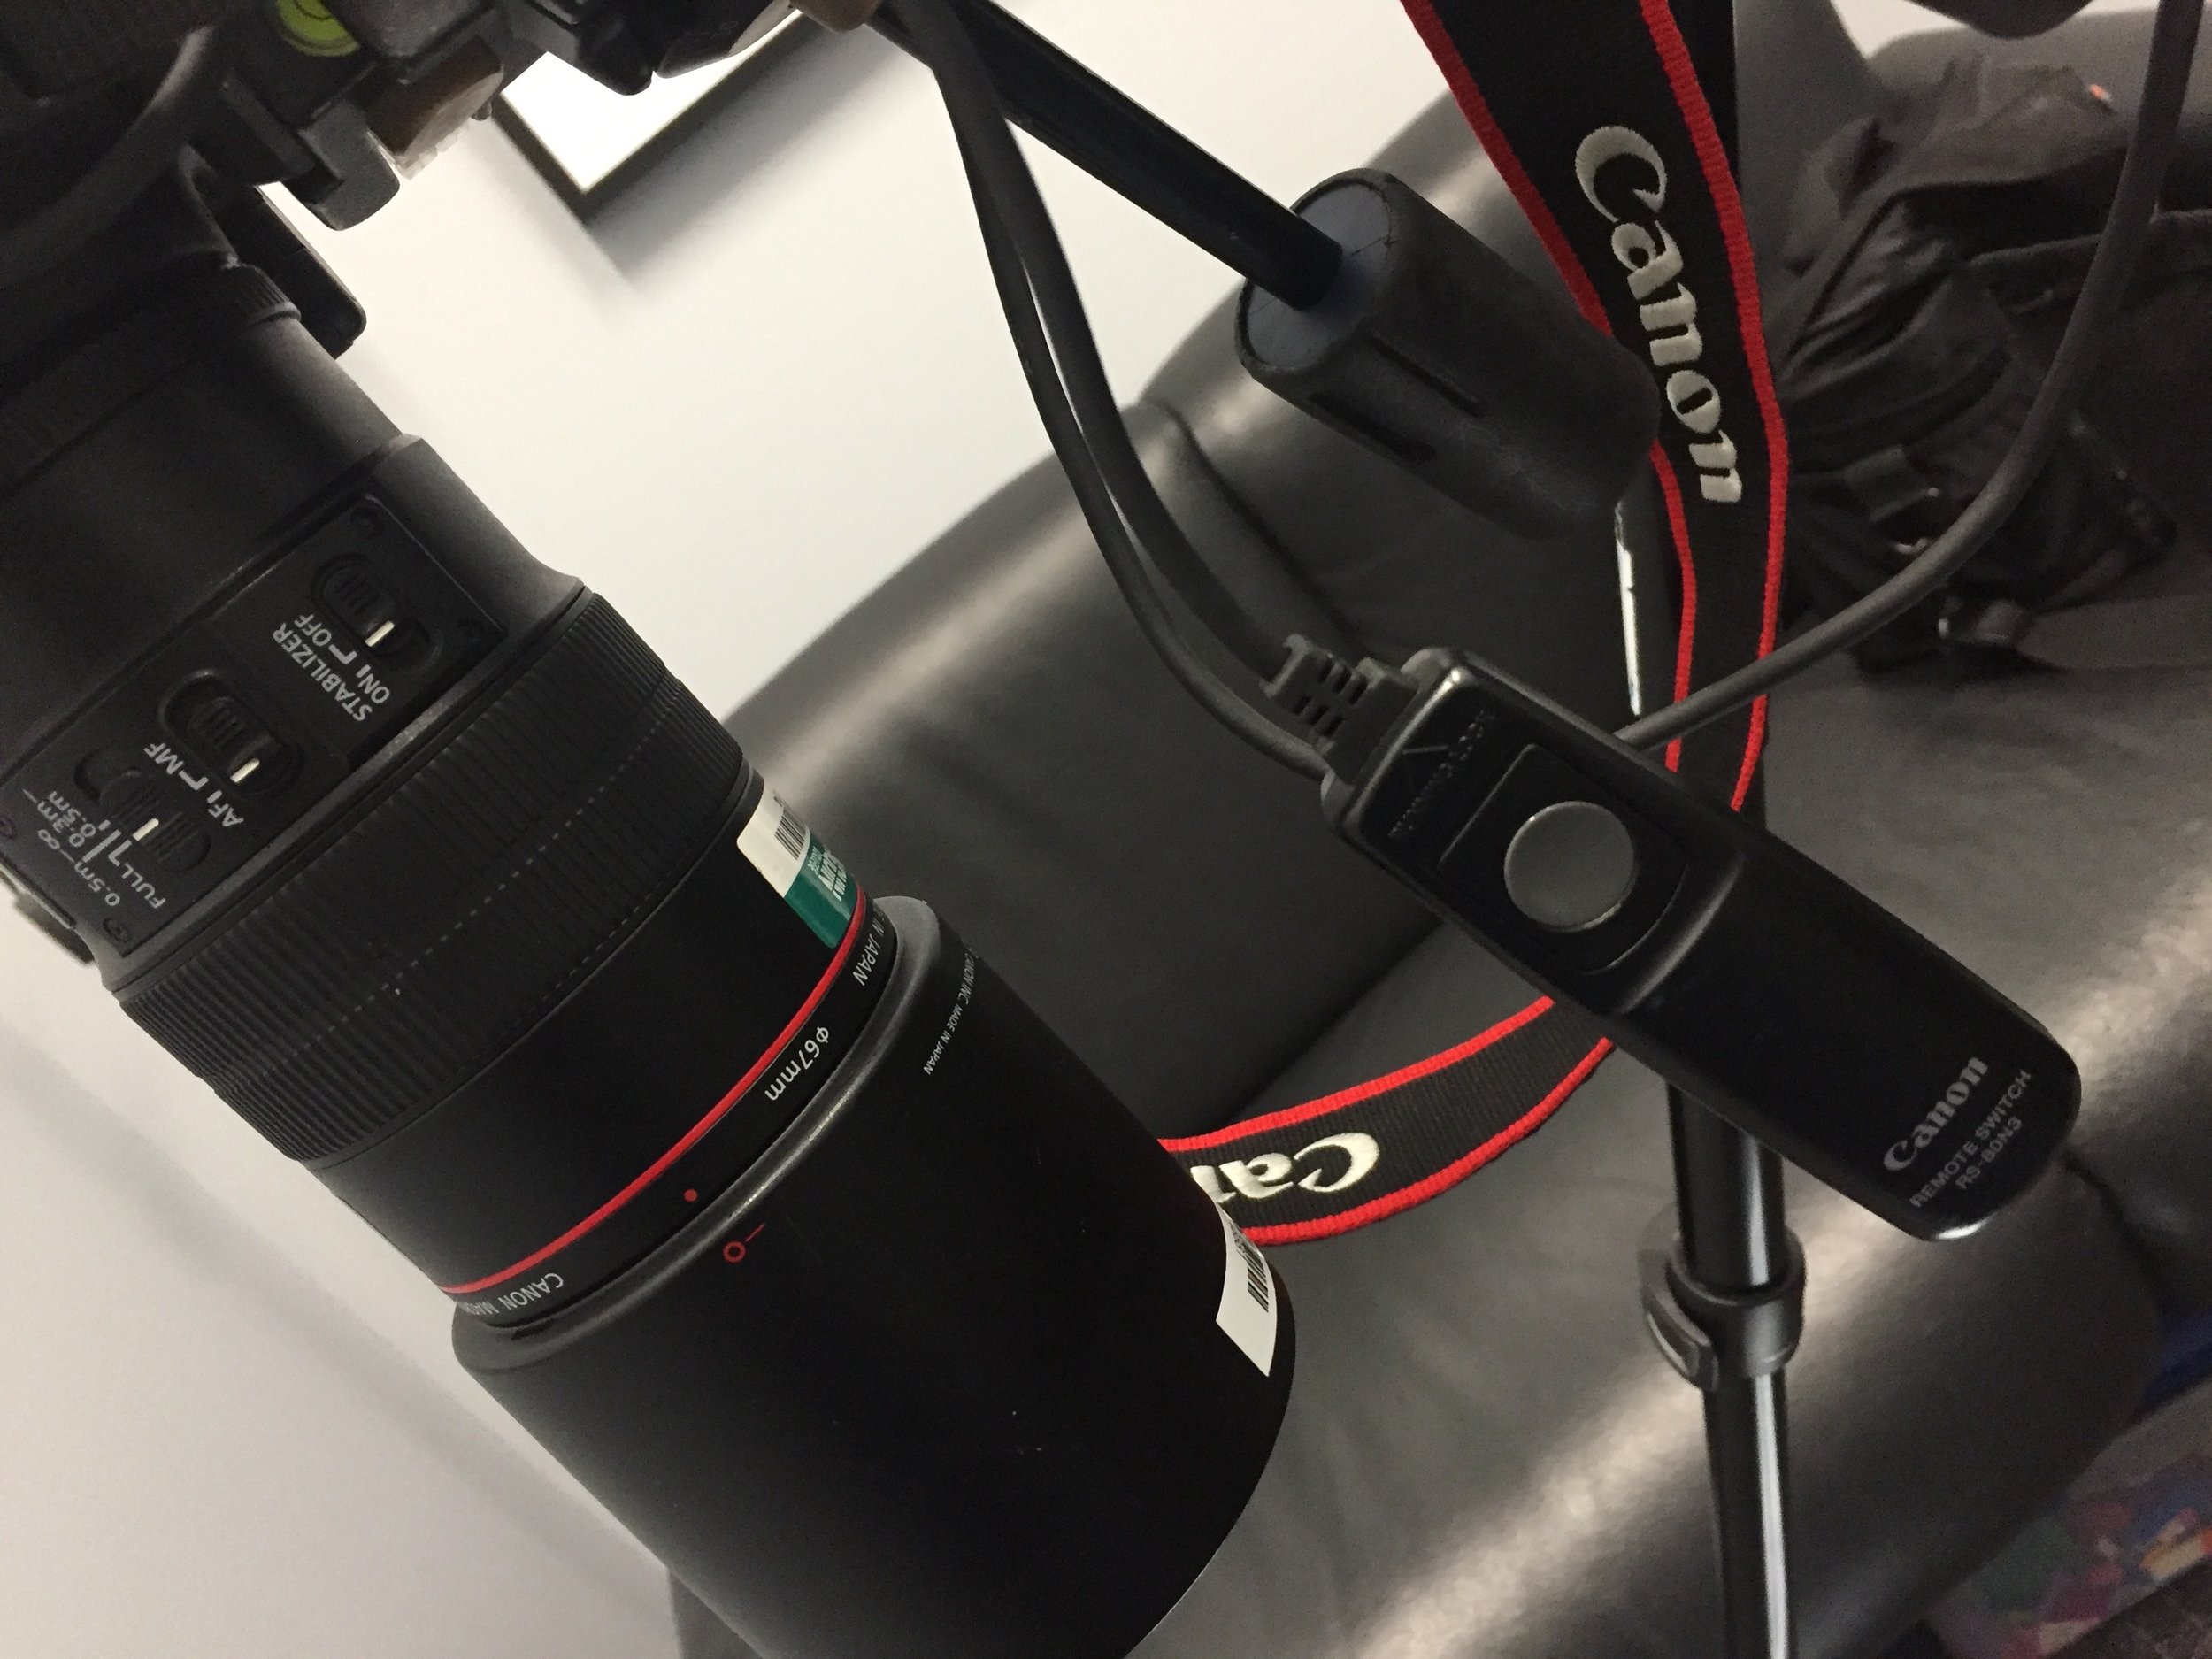
  • Canon 100mm Micro Lens

  • Canon 5D MK III

  • Cable Release

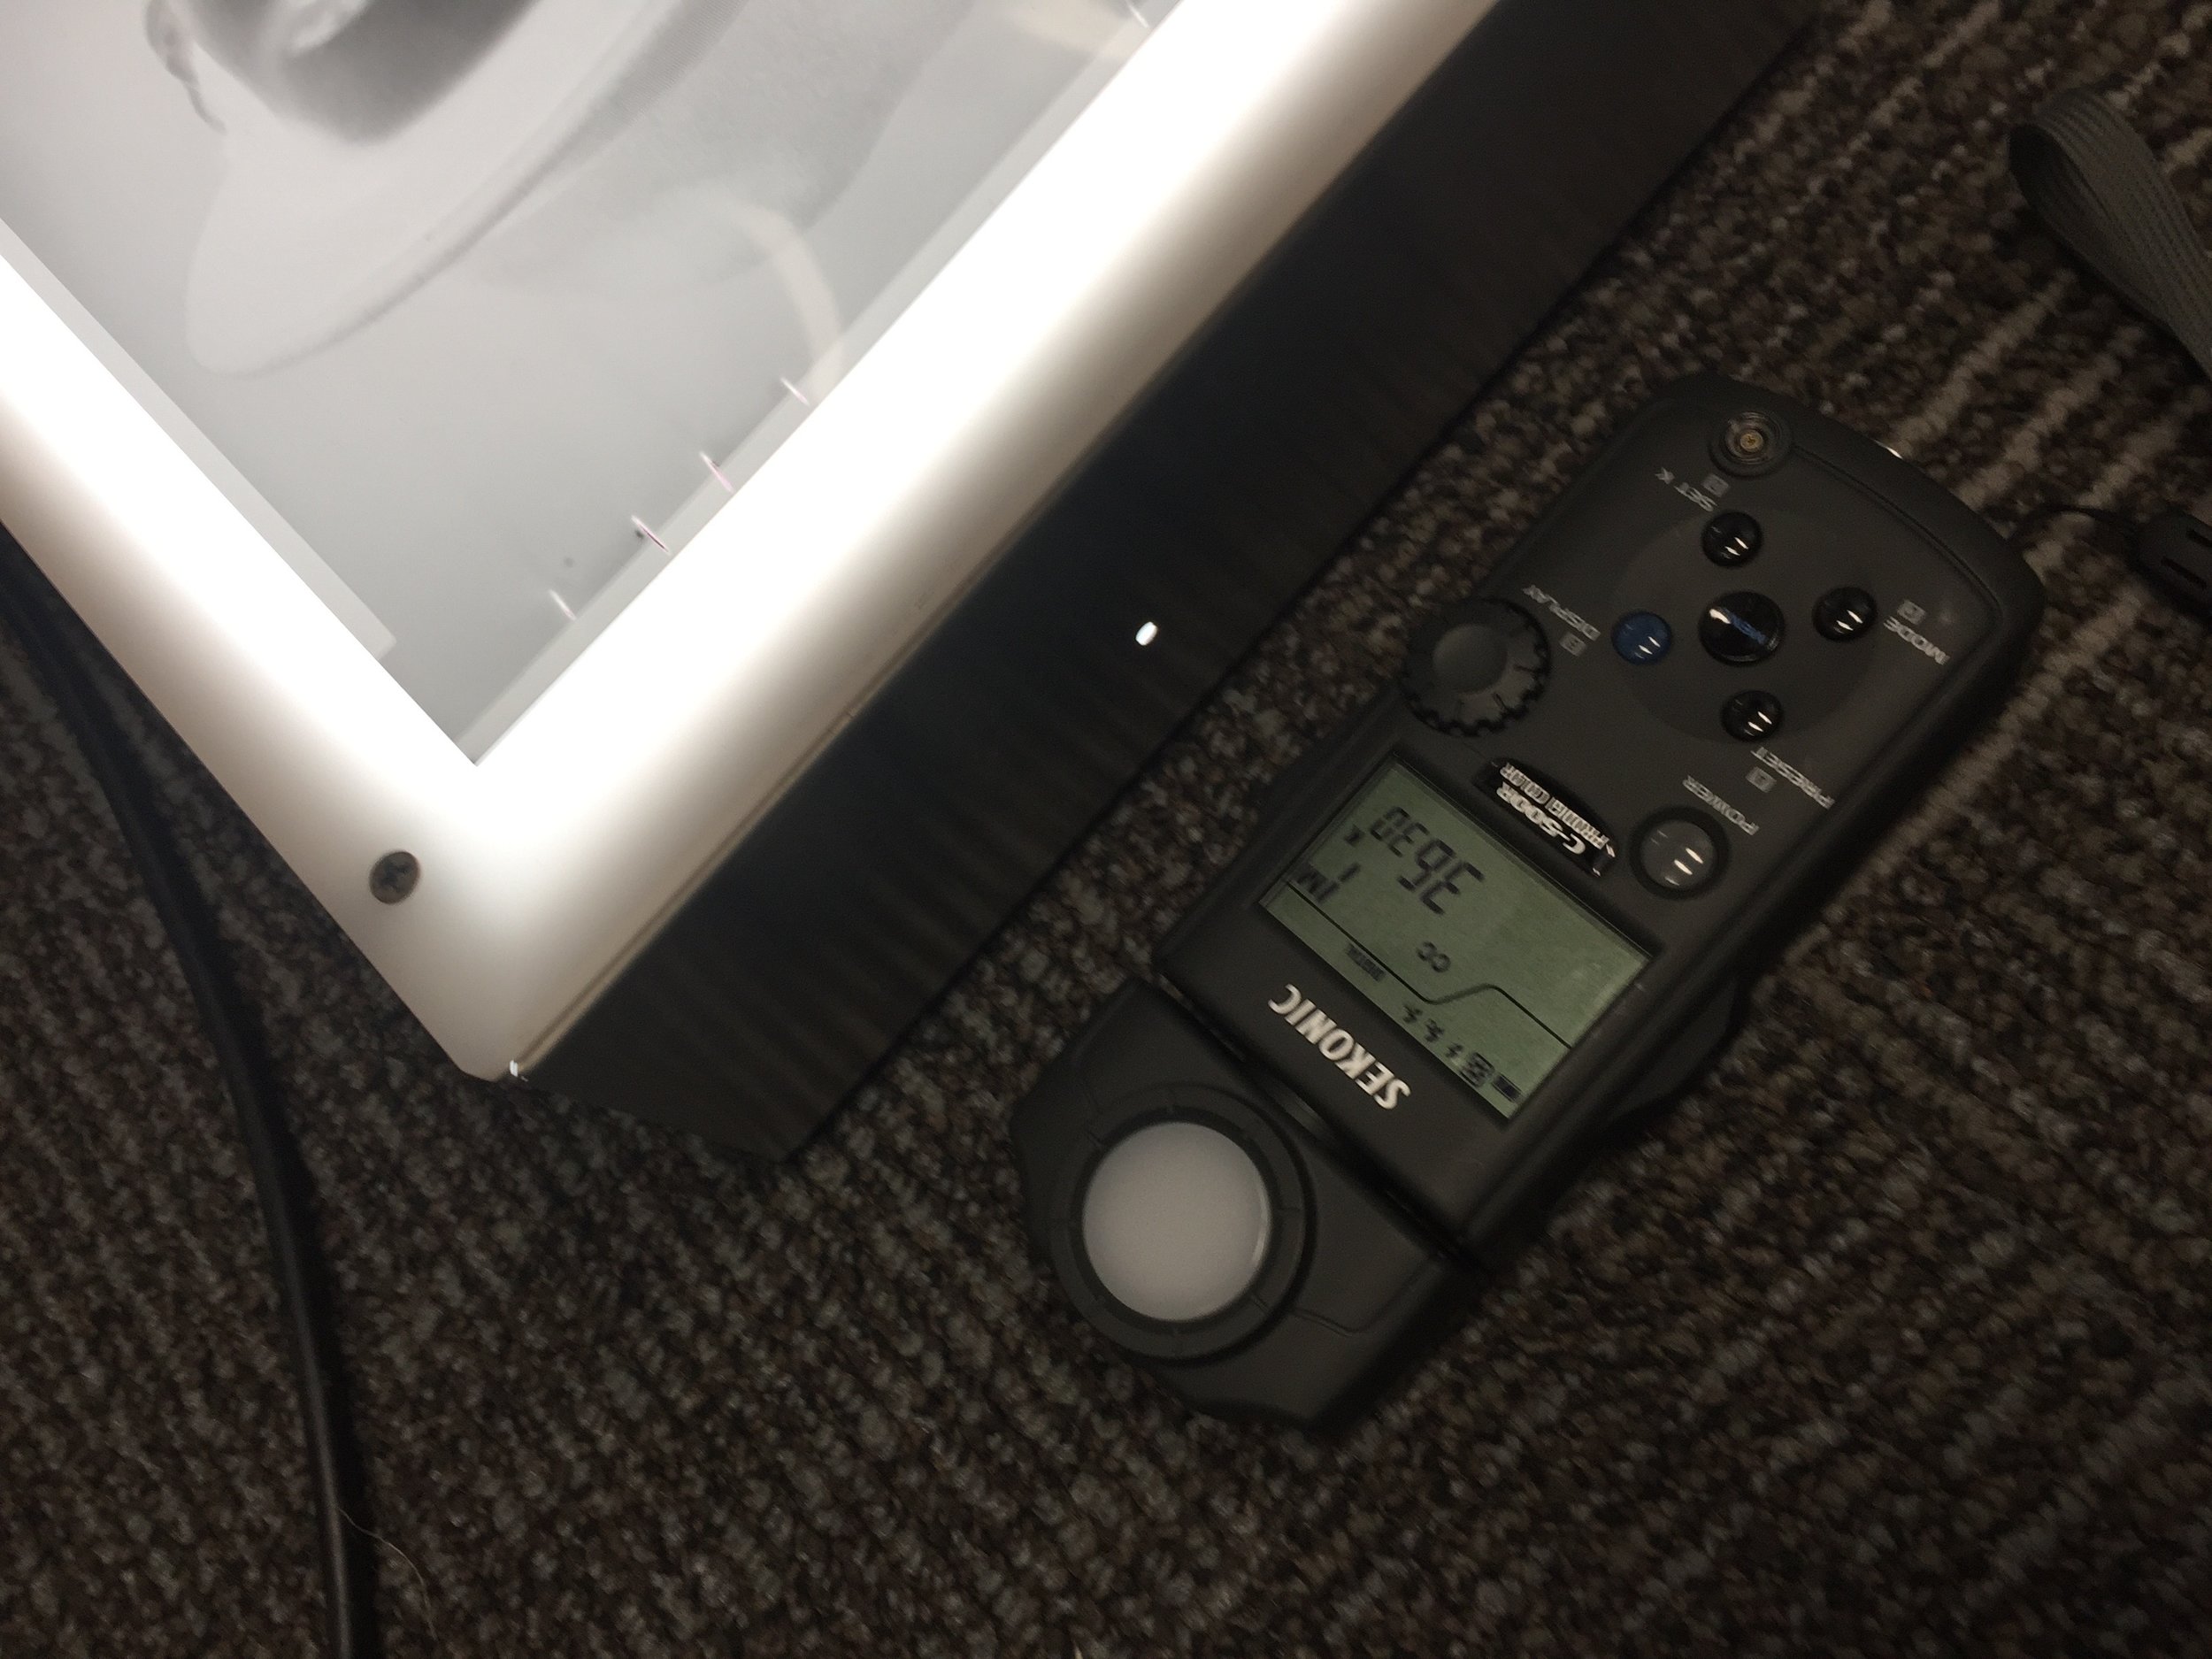
  • Colour Meter

  • Daylight 5500 Colour Correct Lightbox

  • Sandbag

  • Bubble Level

I mounted the camera on the tripod pointing down, with the lightbox below and levelled the camera using the bubble level. I used a cable release so I would not be touching the camera, reducing camera shake. I taped the negative film down on the lightbox and focused the camera, I set my white balance to 5500, set the camera setting to RAW and neutral, and took a shot. The images were very blue green so I used a colour meter to measure the lightbox and got a reading of 3630 and shift of 1 magenta. I set the camera's white balance to these settings and compensated for the colour shift by adding the digital colour shift to the camera. Took a shot and the image colour turn out neutral. The reason I compensated for the colour was because it has been my Another way of digitizing your film is using a digital camera, this technique I discovered while taking an online class Douglas Kirkland on Photography: Shooting with an 8x10 Camera. Kirkland explains his process, he uses a copy board stand to mount the DSLR camera pointing down, the negative is laying on a daylight corrected lightbox, and he uses a 50mm macro lens.

Douglas Kirkland on Photography: Shooting with an 8x10 Camera (Source: LinkedIn Learning, 2019)

My initial calculation is that printing at 1440 dpi (Epson Manual), the resolution of the Epson 9900, my maximum print size would be 4"x2.6". The formula for this calculation is:

22.3 effective megapixels 5760x3840 of Canon 5D MK III Sensor (Canon, 2019), divided by maximum resolution of Epson 9900 printer 1440.

5760 / 1440 = 4

3840 / 1440 = 2.6

______________

This is a concern bout I thought I would try and see for myself. At the time I was photographing 8x10 film. The equipment I used to photograph the film:

  • -Tripod with horizontal camera mount

  • Canon 100mm Micro Lens

  • Canon 5D MK III

  • Cable Release

  • Colour Meter

  • Daylight 5500 Colour Correct Lightbox

  • Sandbag

  • Bubble Level

I mounted the camera on the tripod pointing down, with the lightbox below and levelled the camera using the bubble level. I used a cable release so I would not be touching the camera, reducing camera shake. I taped the negative film down on the lightbox and focused the camera, I set my white balance to 5500, set the camera setting to RAW and neutral, and took a shot. The images were very blue green so I used a colour meter to measure the lightbox and got a reading of 3630 and shift of 1 magenta. I set the camera's white balance to these settings and compensated for the colour shift by adding the digital colour shift to the camera. Took a shot and the image colour turn out neutral. The reason I compensated for the colour was because it has been my expereince that colour shifts, especially blue cyan, can add density to a image when converted to black and white.

Reviewing the images on my computer I found that they were soft and lacked the quality of the Epson V750 scans, which I also found to be soft. The Epson scans lacked contrast but the Canon captures were more contrasty and lacked detail in the shadows. The image sizes matched my calculations above, the images would be very low resolution going to print and would produce a very poor image at the size I needed.

This is a form of digitization that I would not use. The image quality was poorer than a flatbed scan, the contrast was too high and the setup was too much work for the results. I do not plan to print these files as I feel they would be a waste of time at any size.

Citations

LinkedIn Learning, (2019) Douglas Kirkland on Photography: Shooting with an 8x10 Camera. [Online Image]. Available at: https://www.linkedin.com/learning/douglas-kirkland-on-photography-shooting-with-an-8x10-camera/digitizing-negatives?u=2199673 [Accessed 04 August 2019]  

DOF Calculator. (2019) Depth Of Field Calculator. [Online Image]. Available at: https://dofsimulator.net/en/ [Accessed 04 August 2019]  
Machinski, J. (2019) Photographing Negatives, Unpublished.

Canon. (2019) Canon 5D MK III Manual. Available at: http://gdlp01.c-wss.com/gds/8/0300007348/06/eos5d-mk3-im8-en.pdf [Accessed 04 August 2019]   that colour shifts, especially blue cyan, can add density to a image when converted to black and white.

Reviewing the images on my computer I found that they were soft and lacked the quality of the Epson V750 scans, which I also found to be soft. The Epson scans lacked contrast but the Canon captures were more contrasty and lacked detail in the shadows. The image sizes matched my calculations above, the images would be very low resolution going to print and would produce a very poor image at the size I needed.

This is a form of digitization that I would not use. The image quality was poorer than a flatbed scan, the contrast was too high and the setup was too much work for the results. I do not plan to print these files as I feel they would be a waste of time at any size.

______________

LinkedIn Learning, (2019) Douglas Kirkland on Photography: Shooting with an 8x10 Camera. [Online Image]. Available at: https://www.linkedin.com/learning/douglas-kirkland-on-photography-shooting-with-an-8x10-camera/digitizing-negatives?u=2199673 [Accessed 04 August 2019]  

DOF Calculator. (2019) Depth Of Field Calculator. [Online Image]. Available at: https://dofsimulator.net/en/ [Accessed 04 August 2019]  

Machinski, J. (2019) Photographing Negatives, Unpublished.

Canon. (2019) Canon 5D MK III Manual. Available at: http://gdlp01.c-wss.com/gds/8/0300007348/06/eos5d-mk3-im8-en.pdf [Accessed 04 August 2019]  

Lens & Composition: MA Major Study Research

In Post Banner lens comp.png

"The large ground-glass image is an entity in itself, a different experience from using the viewfinder. On the ground glass the image appears upside-down, and we must learn to view it in this position. We soon learn to "understand" the upside-down image, however, and it has a certain abstract quality that makes us more aware of its structure and its borders, as we are not dominated by the obvious dispositions of the subject. In effect the ground glass divorces us from the realistic appearances of the world. The ground-glass image thus exists as a thing in itself, specifically photographic and not merely a simulation of the "view" before the camera."

Adams, A.,& Baker H. R., (1981)

My process through-out my studies has focused only film and photographing with a view camera. Initially I wanted to capture the images digitally but a suggestion by my tutor to look at film and other camera formats lead me to the view camera. I am now fascinated by the process, underneath the black cloth and looking through the back of the camera really does divorce us from the realistic appearance of the world (Adams, Ansel The Negative). Judith Joy Ross said that it is so magnificently beautiful looking through a view camera, it is so mysterious (Judith Joy Ross) and she was right. Besides the amazing image quality there is a tremendous amount of control you have to manipulate the image with the camera movements.

Fig. 1: 360/620mm Technika Symmar Lens On The Right (Source: Machinski, 2019)

Lens

I am using an 8x10 Deardorff camera with a 360mm Technika Symmar lens, Figure 1., this lens is 360mm however it is a convertible lens meaning that by removing a lens element you can get a focal length of 620mm. The lens unconverted has an effective 35mm focal length of 52mm and converted 90mm. To figure out the conversion you multiple the focal length of your 8x10 lenses by .15 and for your 4x5 lenses by .30 (Tim Layton Fine Art). My concern is that the 360mm lens will be too wide, I want to compress the space behind the subject, and have a shallow depth of field.

Fig. 2: DOF Calculator Using 360mm Lens (Source: DOF Calculator, 2019)

Fig. 2: DOF Calculator Using 360mm Lens (Source: DOF Calculator, 2019)

depth of field calculator

Film is expensive so to give me a better understanding of what the final image might look like I began using an online Depth Of Field calculator, see Figure 1. The depth of field calculator allows you to set your aperture, subject distance, background, camera format, etc.. I use this tool to give me a rough estimate of framing and composition of the image and the depth of field. One of the features I like about a view camera is the shallow depth of field that can be achieved, however, it is difficult to focus too. It is my intention to photograph at the widest aperture possible to drop the background out of focus. The depth of field calculator using the 320mm lens was too wide, there was too much background included in the shot and the subject was too small. An option would be to move the subject forward but I know at 25 feet I can focus on my subject and not encounter any exposure compensation with the camera and lens combination I am using. If I did move closer I would need to apply the exposure compensation and I realize that this would affect my shutter speed which might already be very low. This is not an option and pushing my film to 800 ISO is not something I want to do either.

Using a 620mm lens in the calculator gave me the framing and composition that I was looking for, I do want to crop the bottom more so I will use the camera’s front rise to crop the subject below the knees.

Fig. 3: DOF Calculator Using 620mm Lens (Source: DOF Calculator, 2019)

technical concerns

There are two concerns that I have, one that the converted lens will not be as sharp. I can not find any documentation online to support this concern of mine but I can not imagine that removing the back lens element would allow it to maintain a sharp focus. Another concern is shooting wide open at F11, I will not be able to focus the camera precisely, I have about a foot of focus at that aperture. The Deardorff is an older wooden camera so the focus is not as precise as my 4x5 Sinar and the focusing ground glass is not as bright.

Fig. 4: Cropped For Final Composition (Source: DOF Calculator, 2019)

composition thoughts

One of the reasons I want to crop the subject above the knees is I do not want any foreground. The reason for this is I want this to be a metaphor for their journey up to this point, the path forward is unclear. I do want the subjects to appear to be in motion though I do not want them to appear to be statues. In Figure 4, I cropped the depth of field calculator image to compensate for the rise I want to apply. The large amount of space above I want to represent the sense of freedom the migrants feel being in their new country but I do not want the top to be open to the sky completely, not to airy and free. This is because I get a sense from the interviews of the migrants that they will never feel completely comfortable in their new country, their journey has changed them in a way made them more worldly and at the same time they realize their displacement in the world.

Citations

Adams, A., Baker H. R., 1981. The Negative. 12 th ed., Bulfinch Press.

DOF Calculator. (2019) Depth Of Field Calculator. Available at: https://dofsimulator.net/en/ [Accessed 04 August 2019]. 

Machinski, J. (2019) 360/620mm Technika Symmar Lens On The Right. August 2019. Unpublished.

On Location: MA Major Study Development

In Post Banner  locations.png

These are two separate location setups the Test Shoot with Mark Baylin and the First Shoot with Deng. For each I was using the Deardorff 8x10 Field Camera and a portable battery pack system for lighting, an Elinchrom Ranger pack and a Profoto B1.

The battery pack lighting systems was used as the 8x10 generally needs a bit more light than digital capture and I was not sure if I needed to match the intensity for he sun or overpower it. These lights are quite powerful and they also allowed me to use a soft box to soften the light.

The second location with, the subject Deng, was the same location from the Gear & First Shoot: MA Major Study post. Like the location scout I photographed Deng in the early light, the light is softer and easily balanced with the flash’s power.

I use an ambient incident light meter, spot meter and flash meter to get initial readings. I meter with the spot meter for the areas that I would like darkest detail and put that in Zone III and gauge the rest of the exposure and flash power on that. I set the flash to one stop over the ambient exposure for the Deng shoot. However, I was using the aperture to try and darken or lighten the background something I should have used the shutter speed for. This is because the shutter controls the ambient exposure and the aperture controls the flash to a large degree.

Citations

Baylin, M. (2019) Mark Test Shoot and Deng First Shoot August 2019. Unpublished.

Gear & First Shoot: MA Major Study Development

In Post Banner gear & firs.png

Location Scout

Did a final location scout a week before the first shoot, on the same date and time. Initially I wanted to use an area familiar to the subject, but realized that I would have less control over the locations. I want locations with linear perspective, perhaps roads or paths to symbolize the journey the migrants are on. It was not until after I reviewed the location scout contact sheet that I realized how much I liked image 19, see Image Gallery Fig. 3. There are repeated bollards on the road and the trees frame the street in very nicely, creating a nice enclosed space along with a repeated pattern, which enhances the linear perspective. I planned to photograph Deng on the curb placing his head close to the vanish point.

First Shoot

The first subject for this series wa Deng from South Sudan, we met and I interviewed him a few days before, so the day of we could focus on capturing the photographs. I shot in the morning at 8AM ANNIE LEIBOVITZ QUOTE ON LIGHT IN THE MORNING. I was using flash on the subject, my intention was light the subject one stop over the ambient exposure (f8, 1/30). The camera was set to the flash exposure of f11, 1/30. What I failed to realize at the time was that by setting my background exposure is really controlled by the shutter when using flash. For future shoots I will try to remember that as I would like to bracket the background exposure to see what it would look like darker to lighter than the subject.

The images are soft photographing wide open is difficult to do with a Deardorff, as I had mentioned before, the ground glass is not as bright and the focus control is not that smooth.

.

Citations

Machinski, J. (2019) Contact Sheet. August 2109. Unpublished.

Machinski, J. (2019) Deng & Larry 01. August 2109. Unpublished.

Machinski, J. (2019) Deng & Larry 02. August 2109. Unpublished.

Machinski, J. (2019) Deng 01. August 2109. Unpublished.

Machinski, J. (2019) Deng 02. August 2109. Unpublished.

Machinski, J. (2019) Deng 03. August 2109. Unpublished.

Machinski, J. (2019) Deng 04. August 2109. Unpublished.